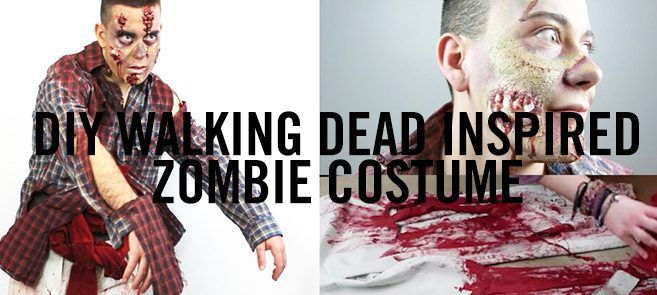
We’ve team up with DIY and Craft All-Star Tanner Bell from “A Little Craft in Your Day” for this straight spooky “Walking Dead” inspired costume! All it takes is a thrift store shirt, pants, old socks, and of course—our favorite DIY costume necessity: VELCRO® Brand Sticky Back for Fabrics.
You’ll need:
- One button-down shirt
- One undershirt
- One pair of pants
- 12-14 old socks
- Scissors
- A marker
- VELCRO® Brand Sticky Back for Fabrics
- A needle and thread
- Red clothing dye
- Fake blood
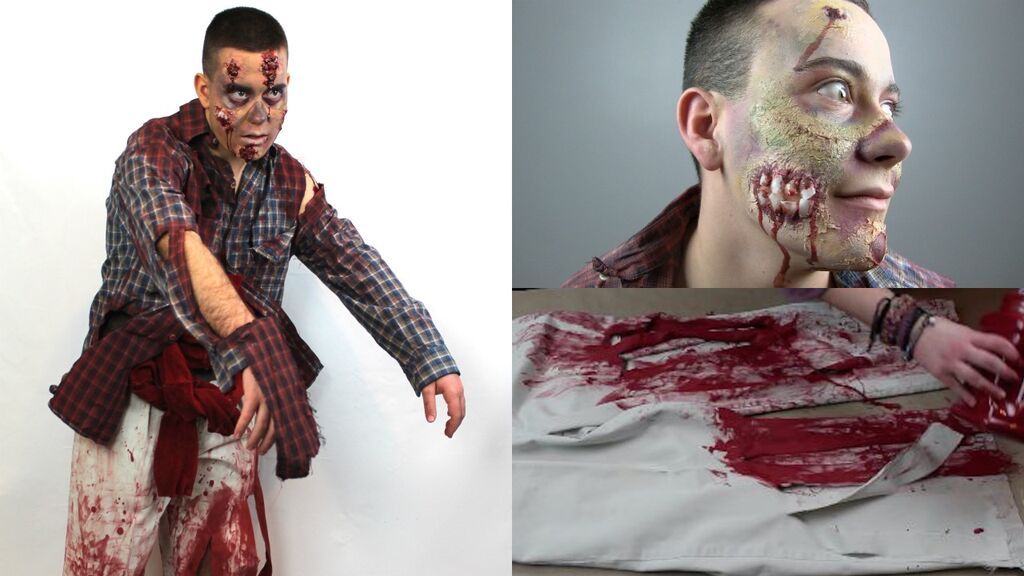
Try on the over shirt and pants. With the marker, make a small X or dot in the areas you would like for the costume to be torn. If it helps, stand in front of a full length mirror or have a friend assist you with this part.
After removing the shirt and pants, lay them on a flat surface. With a pair of scissors, make a small cut on each of the marks you made. This will serve as a ripping point for distressing the costume.
With your fingers, begin ripping the cloth. The tears can be as large or small as you like.
Using your hands or a sponge brush, smear fake blood around the tears in the fabric. You can also splatter the blood onto the fabric with a paint brush. Go crazy. Zombies are messy.
Guts:
Sew together, end to end, 12-14 used socks to form a rope shape.
Dye and process the socks following the instructions on your red fabric dye of choice.
Try on your undershirt. With your marker, make a dot about 1/3 of the way down from the neck of the shirt, near the center.
After removing the shirt, lay it flat on the table. Below the first dot, make two more dots side by side, and below those, three dots, and so on. You’ll be making the dots in a pyramid formation to the bottom of the shirt, or to where it will tuck, like so:
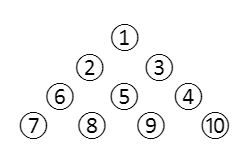
Now, match up your VELCRO® Brand Sticky Back for Fabrics pairs, sticking the prickly sides and the soft sides together. Peel them from the sheet and firmly apply the sticky back of each prickly side to one of your dots. This should leave the sticky back of the soft side exposed and facing you.
Take one end of your sock rope guts and press it firmly to the first, top dot of the Sticky Back for Fabrics on the shirt. Following the pattern of the dots mentioned above, loosely stretch and affix the rope to each of the following dots in order. Excess guts may be left to dangle from the shirt, or you may choose to weave them back up through the attached portions to give them a more tangled look.
Try on the finished costume, leaving the over-shirt unbuttoned beginning just below the top of the guts. Fold back the shirt tails and, using two more Velcro pairs, secure them just to the side of the shirt so as to expose and frame the intestines. You may add more fake blood at this time for a wetter, gorier finish.
Click here to watch the DIY Zombie Costume video series from A Little Craft In Your Day!
 |
VELCRO® Brand Sticky Back for Fabric 24in long x 3/4 inch wide Now Just $3.99 Fast Shipping |