You know how it’s cool to stay in school? Well, it’s also cool to stay stylish and organized in school! ?
Whether you’ve got a little one starting school in the next few weeks or looking to keep yourself more organized as the seasons change, we’ve got a little Sewing 101 just for you.
DIY BACK TO SCHOOL PROJECTS
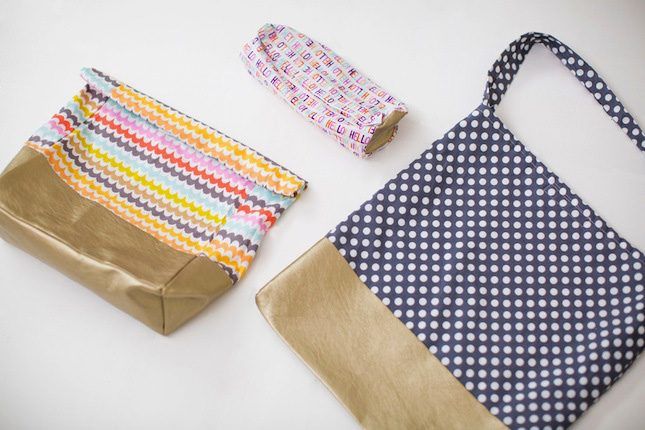
We put together a series of projects to help you create a trio of matching bags that can easily be customized for any style. Follow the steps below to create your own tote, pencil case and lunch bag.
This is a great project to do with kids, so long as moms (or babysitters, aunties or big sisters) handle the sewing machine part of it.
Have a specific project in mind? Click below to jump to a section!
Tote Bag – Pencil Case – Lunch Bag
Materials (for all 3 projects):
– patterned fabric
– gold faux leather
– VELCRO® Brand Sew On Tape
– Heat Bond
Tools:
– iron
– sewing machine
– fabric scissors
– scissors
– sewing pins
– measuring tape
As you can see, the materials are actually pretty minimal for three totally different pieces.
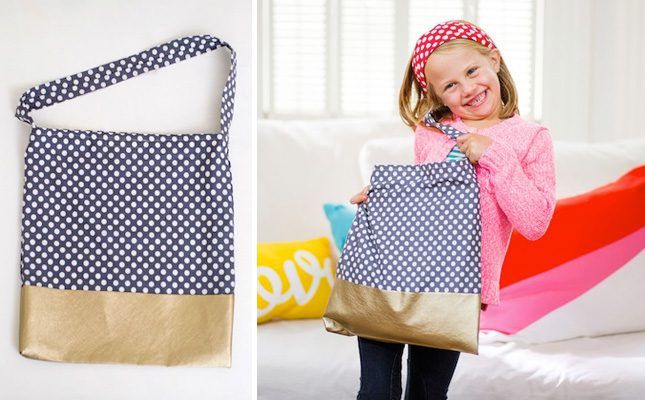
CREATE YOUR OWN STYLISH TOTE BAG
We’ll start with the tote bag. This takes your typical DIY tote to the next level with a contrasting liner, leather-dipped bottom and VELCRO® Brand closure. There are a lot of steps — but we promise it’s super easy to make!
Instructions:
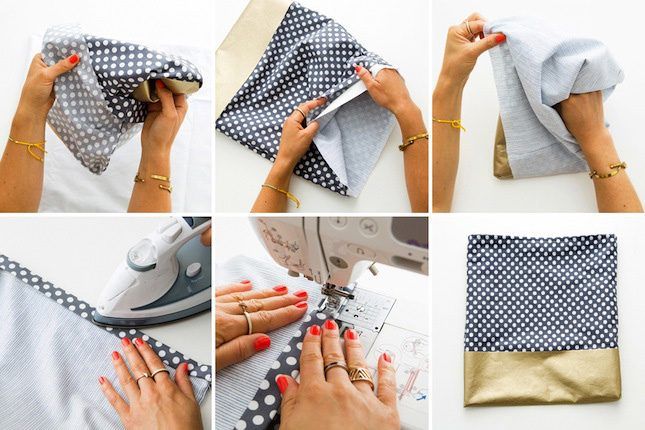
1. First, let’s get all our fabric cut. Fold your exterior fabric in half. Measure 17 x 15 inches on each fabric. Then, cut out your bag exterior. The folded side will be the bottom of the bag (15 inches).
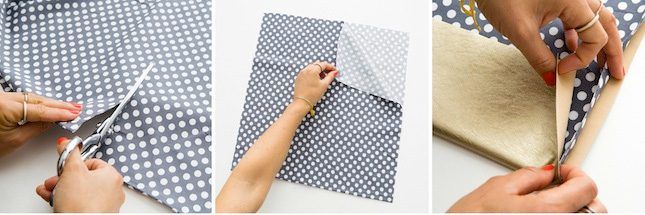
2. Measure and cut out your gold faux leather. Your piece should be 15 x 9 inches. The 9 inch side will wrap around the bottom of the bag, so you’ll have 4 1/2 inches on each side of the bag.
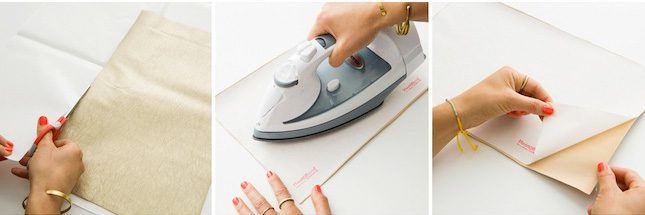
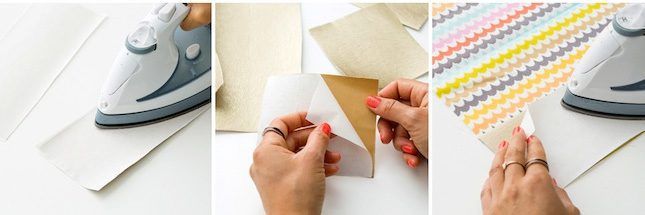
3. Cut and measure a piece of Heat Bond that matches the dimensions of the gold faux leather. Iron the Heat Bond to the gold faux leather, then peel off the paper backing and iron the other side to the bag exterior. Do so with the gold wrapped around the bag to make sure it lays smoothly. Cut your liner fabric to the same size, also folded.
Now you’ve got your two key pieces. Time to sew.
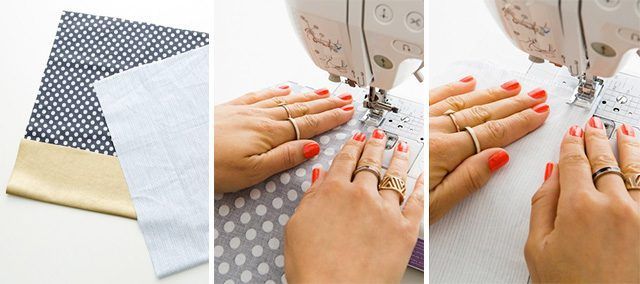
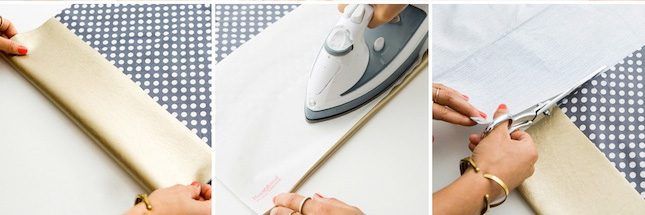
4. Turn your exterior inside out, pin the long edges and sew. Do the same with the liner. Flip the bag right side out and then stuff the liner inside. Then flip the entire bag (liner and exterior inside out). Fold the top edge over two times, iron and stitch creating a proper hem. Then turn your bag right side out.
5. Cut out a strap the length you desire (ours was 2 ft x 4 inches). Fold the strap in half inside out, iron and sew along the open edge. Then flip the strap right side out and iron it a second time (it tends to get wrinkly during the flip). Pin the strap to the sides of the bag and then sew a square to attach it. Do this on both sides.

6. Finally, cut out a piece of VELCRO® Brand Sew On Tape and pin each side to the top edge of the bag. Sew along the edges of each piece of VELCRO® Brand Sew On Tape, and you’re done!
CREATE YOUR OWN STYLISH PENCIL CASE
Next up, a pencil case to keep all your pens, pencils and other school supplies in check.
Instructions:
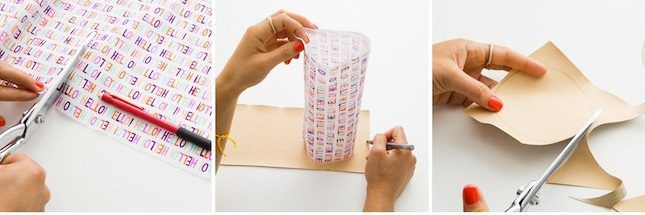
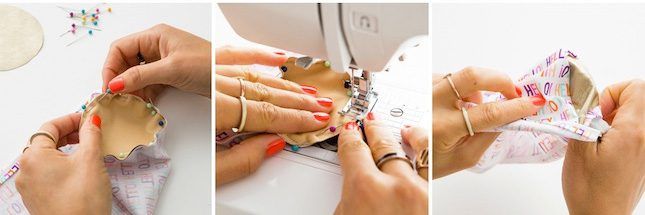
1. First, cut out a rectangle of fabric — ours was 11 x 9 inches. Then, find a circular object to trace that has a 3 inch diameter. Then trace your circle onto the gold faux leather and cut. Repeat this step to create a second circle.
2. Hem the short edge of your rectangle folding it over twice to create a proper hem.
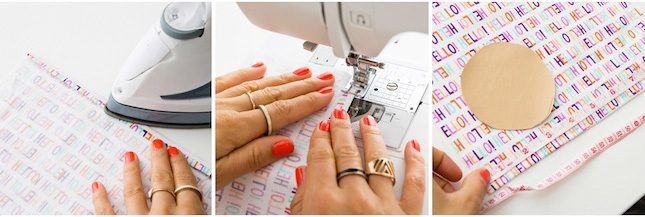
3. Pin the circles to the long edges of the rectangle, wrapping it around the circle to create your pencil case shape. Do this step with both fabrics facing inside out. Sew along the edges of the circle and flip your bag right side out.
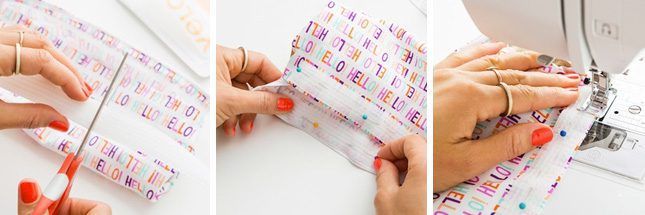
4. To seal up the deal, add VELCRO® Brand Sew On Tape! Cut a piece of VELCRO® Brand Sew On Tape the length of the pencil case. Pin it and sew it to the case.
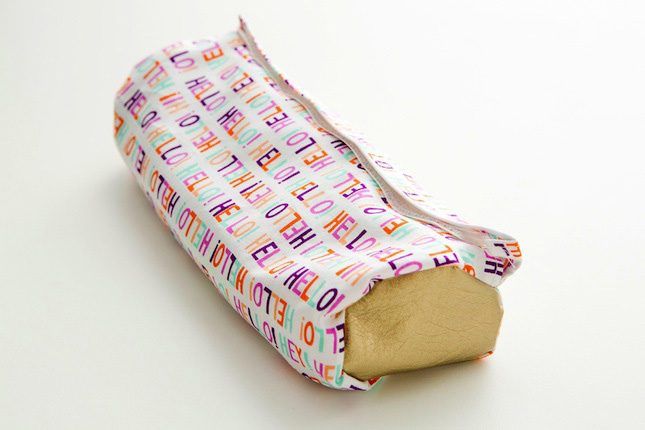
Voila!
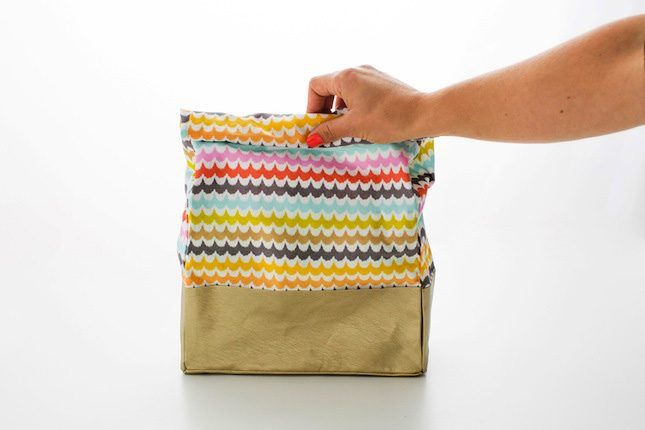
CREATE YOUR OWN STYLISH LUNCH BAG
This last one is definitely the most advanced, but yields extremely stylish results! Forget about making this for the kiddos in your life — make it for yourself!
Instructions:
1. First, let’s get all our pieces in a row. Fold your main fabric in half.
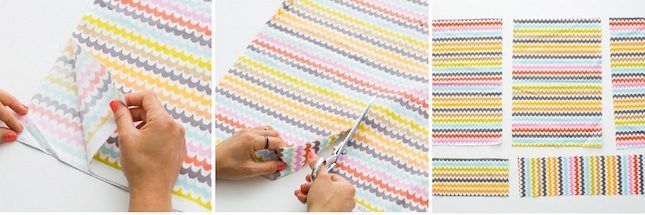
2. Cut out five pieces with the following dimensions:
– 2 pieces 10 x 15 inches
– 2 pieces 4 1/2 x 15 inches
– 1 piece 4 1/2 x 10 inches
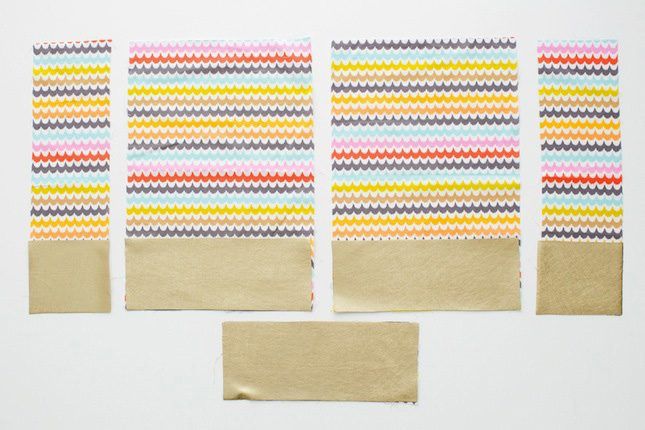
3. Then, cut out five pieces of gold faux leather with the following dimensions:
– 2 pieces 10 x 4 inches
– 2 pieces 4 x 4 1/2 inches
– 1 piece 10 x 4 1/2 inches
4. Next, cut out five pieces of Heat Bond that match the dimensions as the gold faux leather. Iron all pieces of Heat Bond to the gold faux leather. You could also iron on Heat Bond to a big piece of the faux leather, and then cut to size.
5. Peel off the back and then iron onto the front side of the fabric. You should have six pieces that look like this:
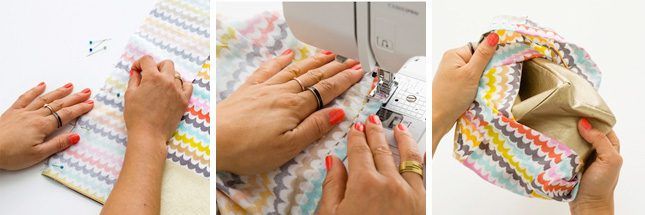
6. Pin all of the pieces together with the fabric facing inside out. You should have a front and back, two sides and a bottom. Start by stitching along all of the edges except for the top. Fold over the top edge two times and sew to create a hem. Turn the bag right side out and then fold the top over a couple times to determine where you want to place your VELCRO® Brand Sew On Tape.
7. Cut a piece of VELCRO® Brand Sew On Tape, pin it to the bag and then sew in place.
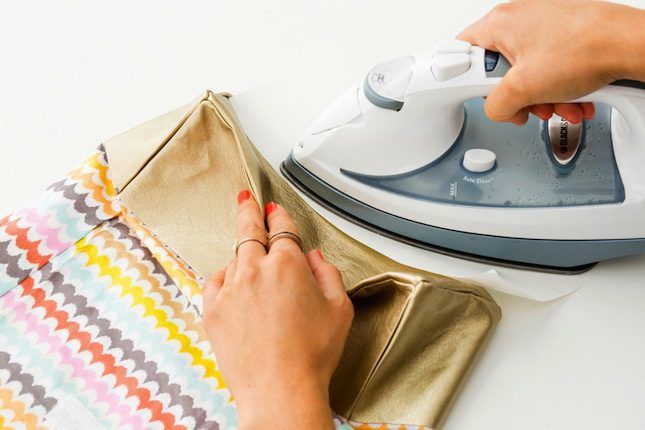
8. Iron the edges where the gold faux leather is to prevent the sides from billowing. Make sure to use the extra paper from the Heat Bond as a protective layer.
And there you have it! You’ve got some A+ first day of school style! ?