This beautiful pompom wreath makes a real statement as part of your Christmas decorations – it’ll look stunning above a mantle piece or if you want to make a smaller version it makes a great alternative for your front door.
To make the wreath, you will need:
- A set of pompom makers
- VELCRO® Brand HANGables® Removable Wall Hooks
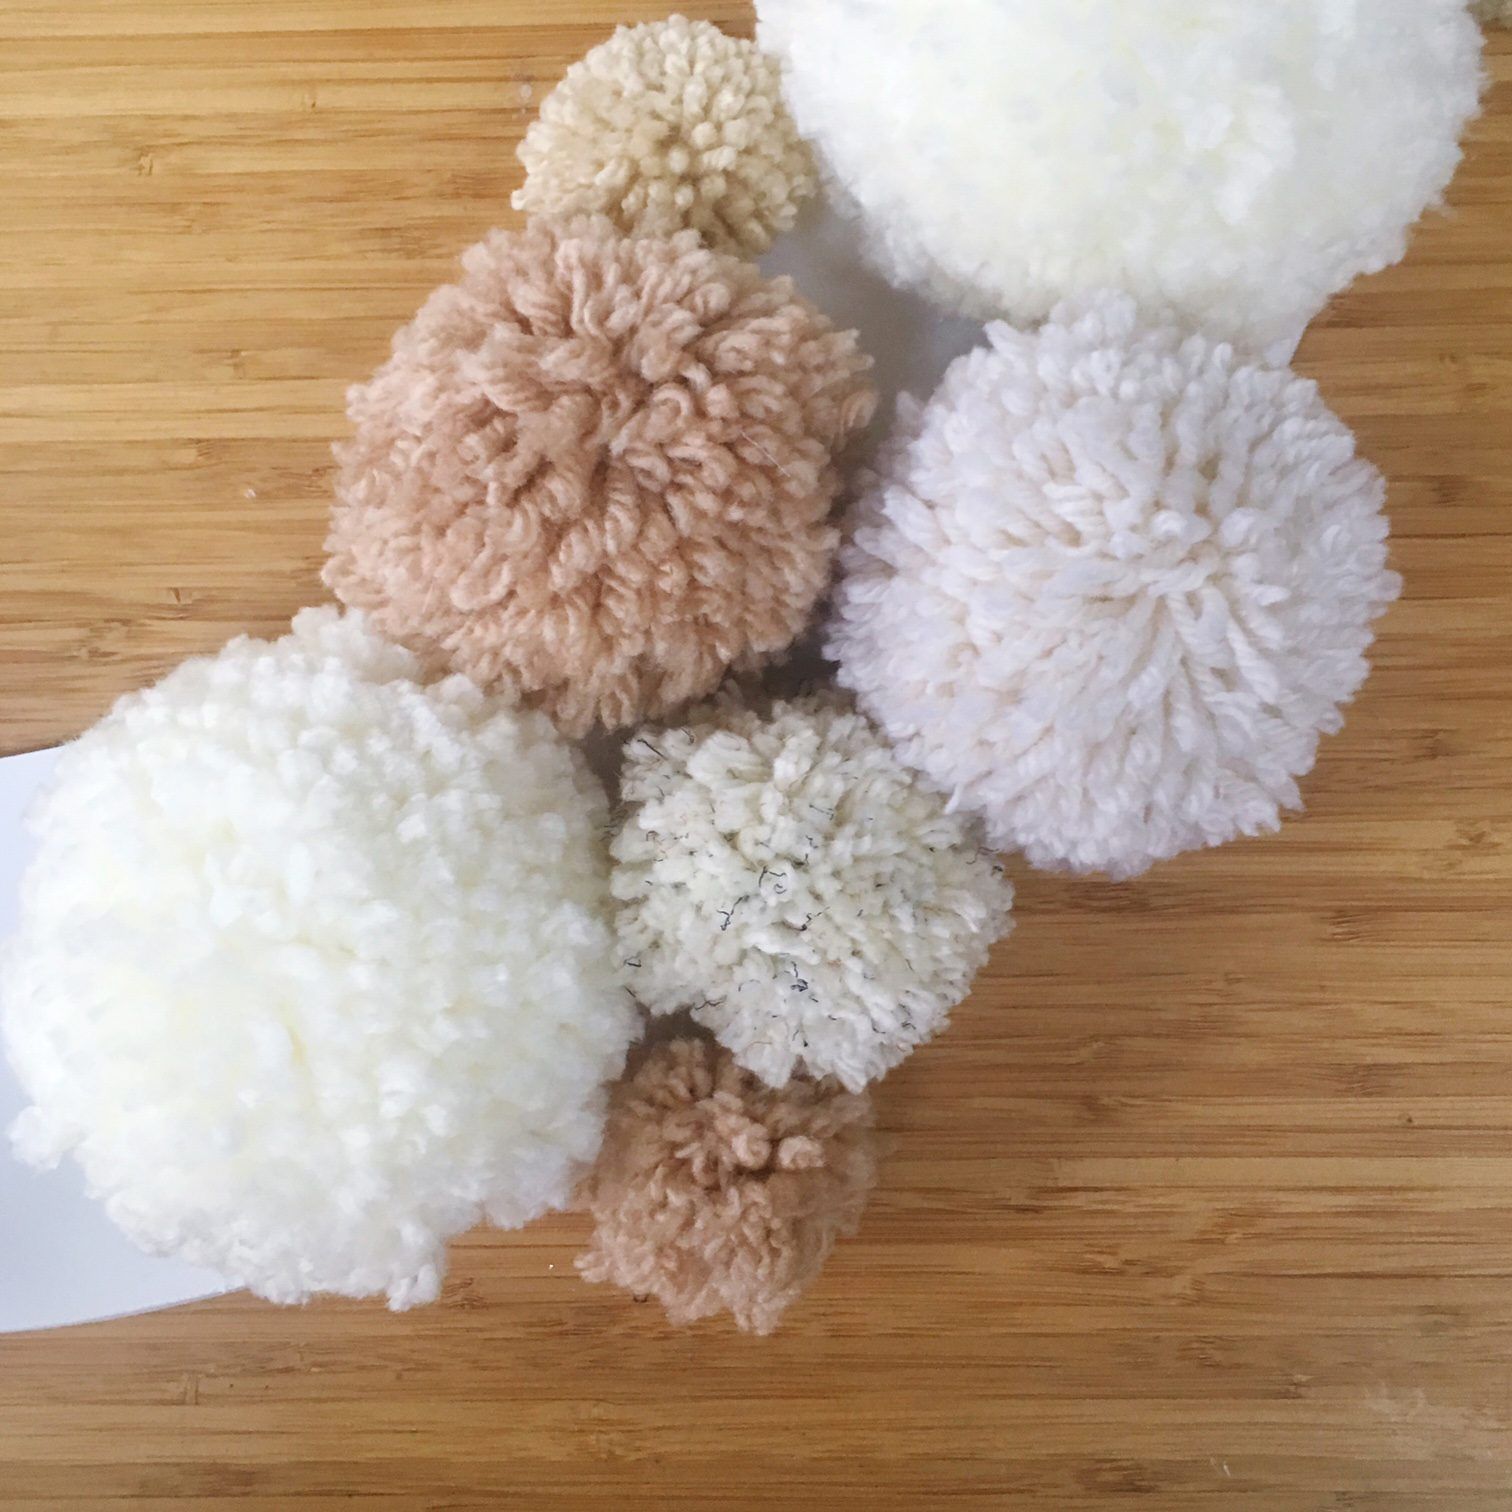
- Variety of white and cream wools – try and get a selection of wools that are different thicknesses and shades – the thicker the yarn the less you need to make a pompom and the quicker it is to make really large poms!
- Scissors
- Glue gun
- Large piece of thick card (approx. 60cm square) – cardboard box or foam board works well.
- Pencil
- Piece of string
- A pin
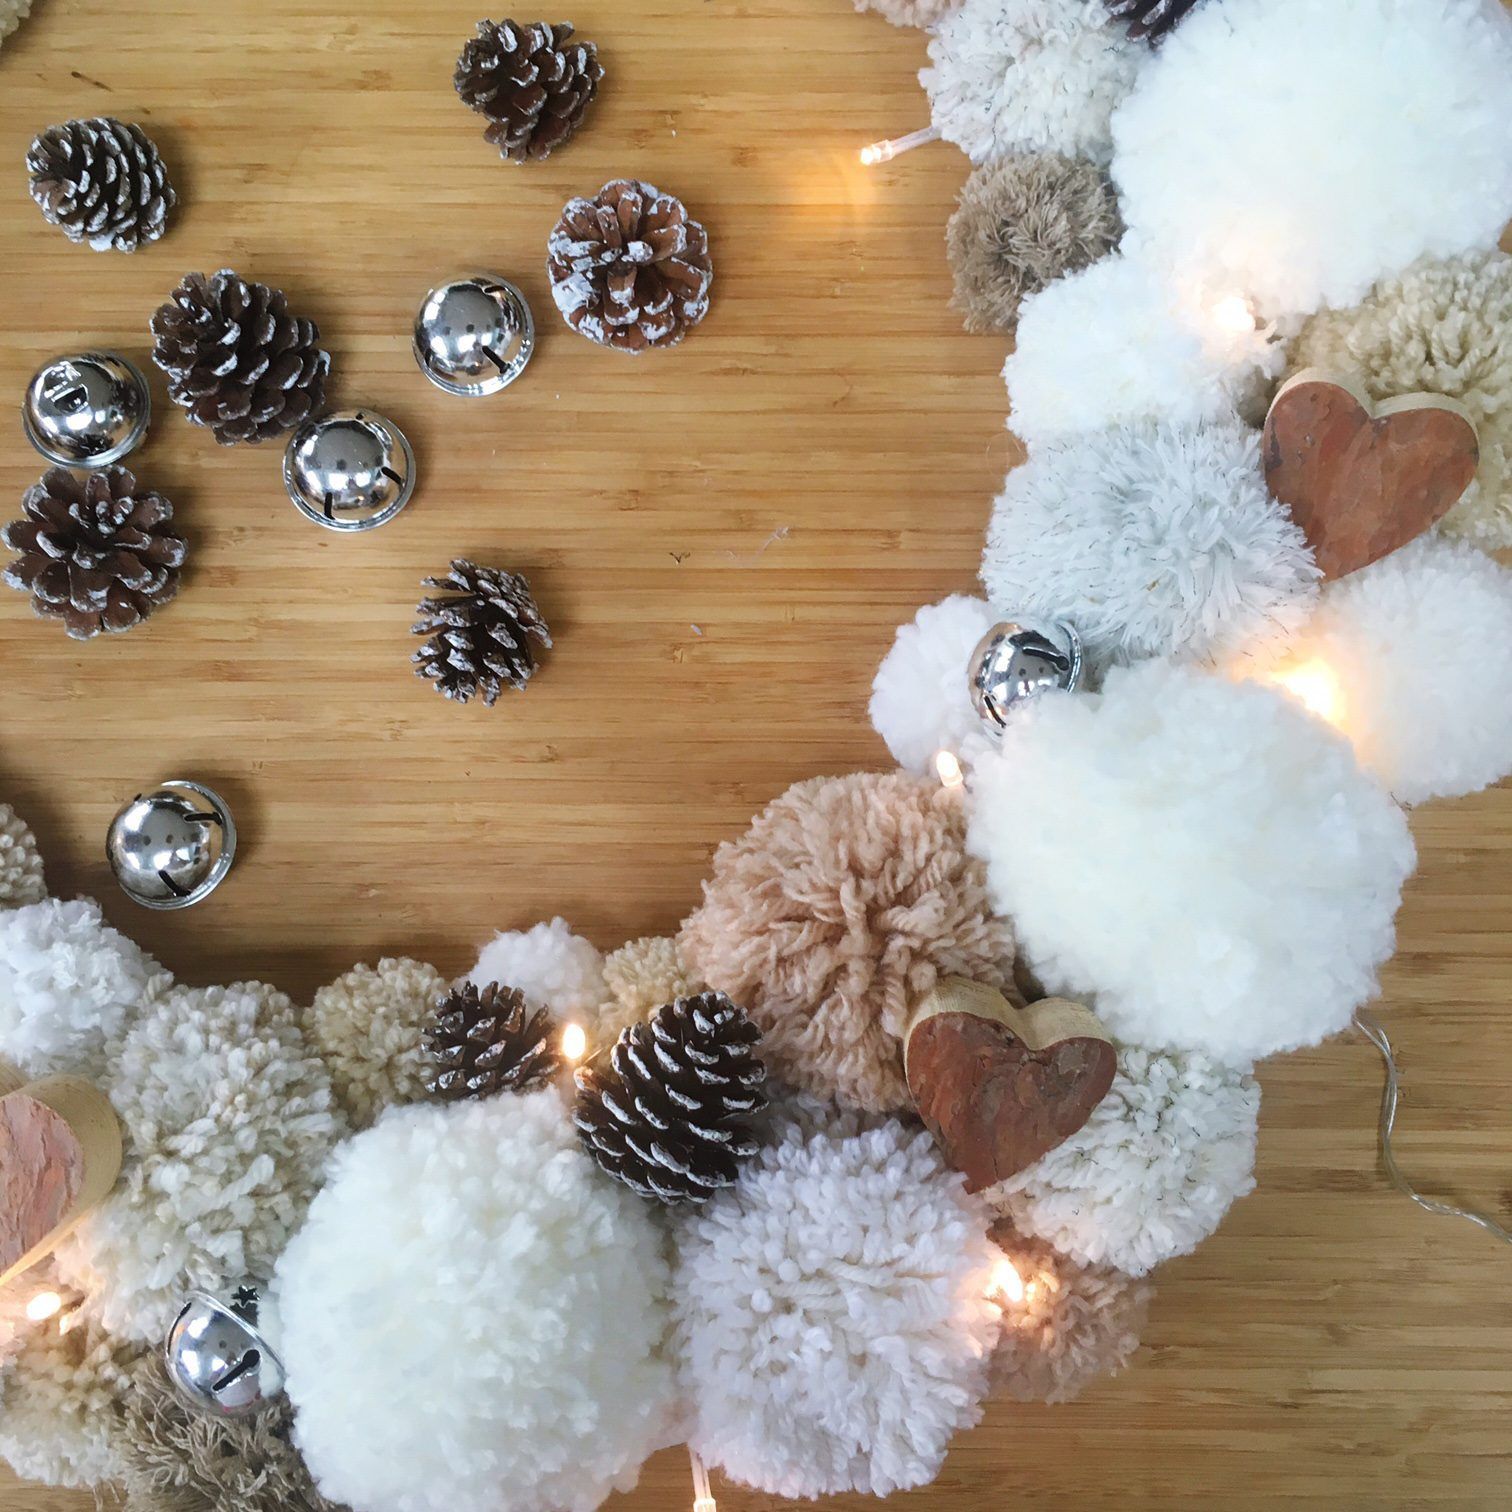
- Decorations – we’ve used some wooden hearts, jingle bells, fir cones and a set of battery-powered Christmas lights.
Time needed: 2 hours
- Wrap the Yarn Around the Pompom Maker
Take the two sections of the pompom maker and fit them together so the dimples sit inside the holes. Then begin wrapping one of your wools around one of the halves until it is completely full.
Then fill the other half.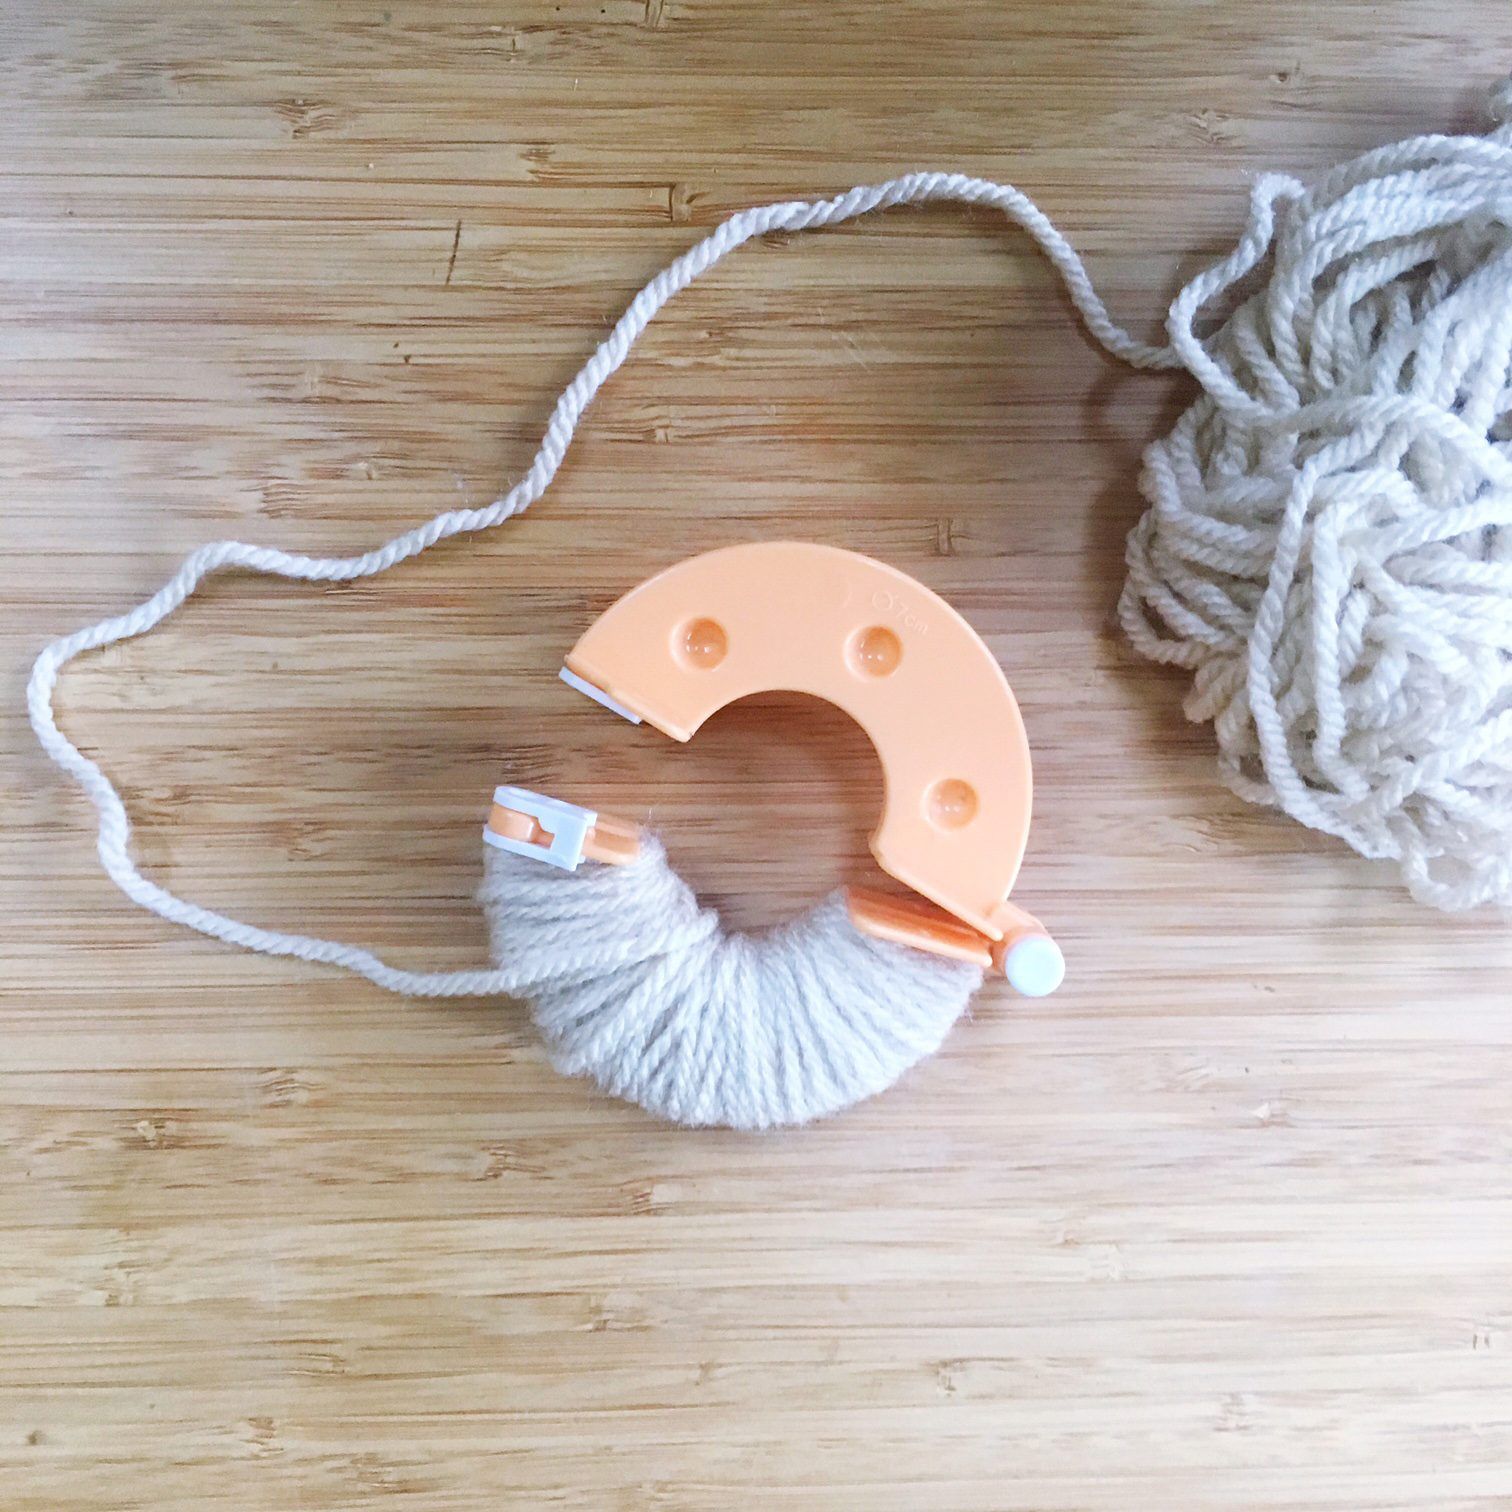
- Cut the Wool
Use your scissors to cut the wool between the two pieces of the maker, then take another length of wool and feed it between the two pieces of the maker. Tie a knot, then wrap the yarn in the opposite direction, pulling the wool tight and tying a double knot.
Remove the pompom from the maker and trim to make the pompom more round if necessary.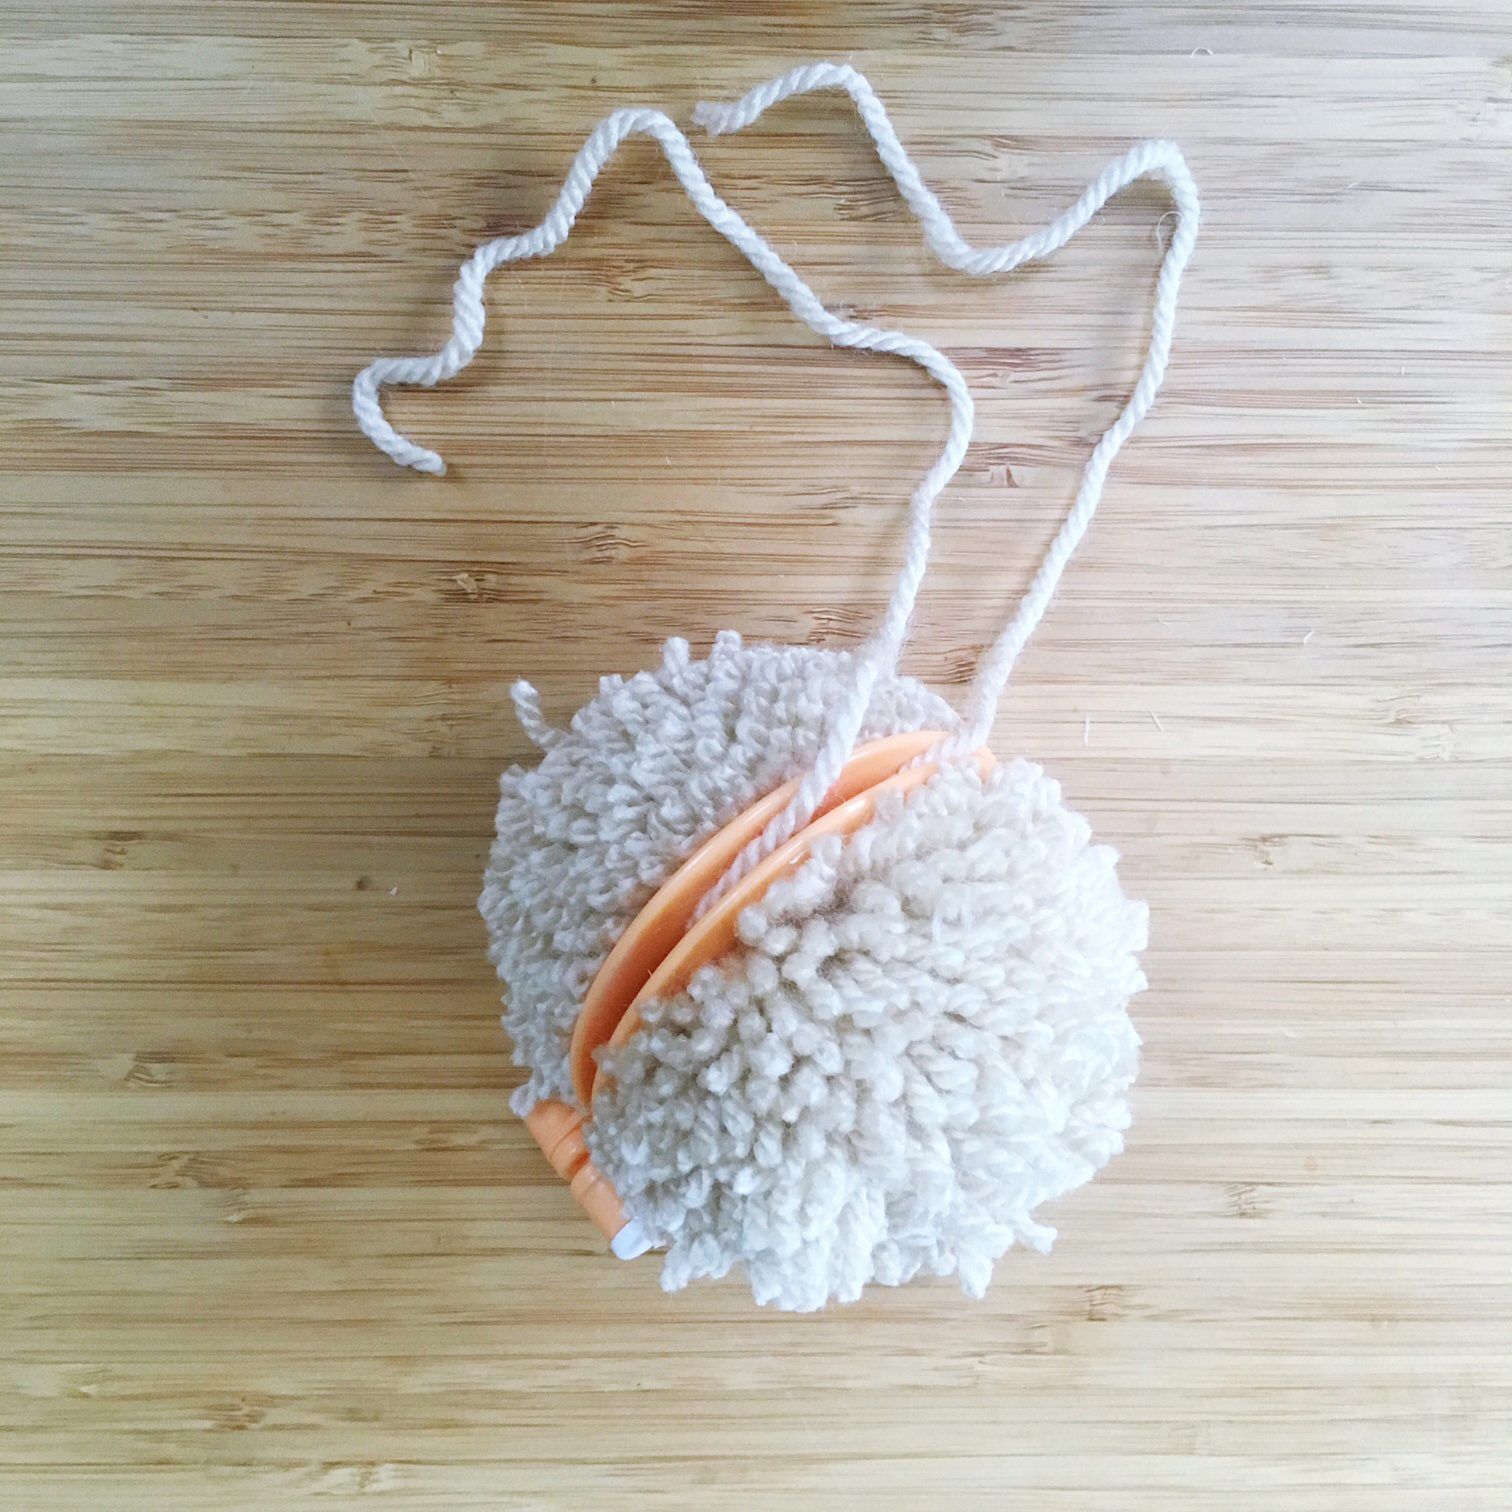
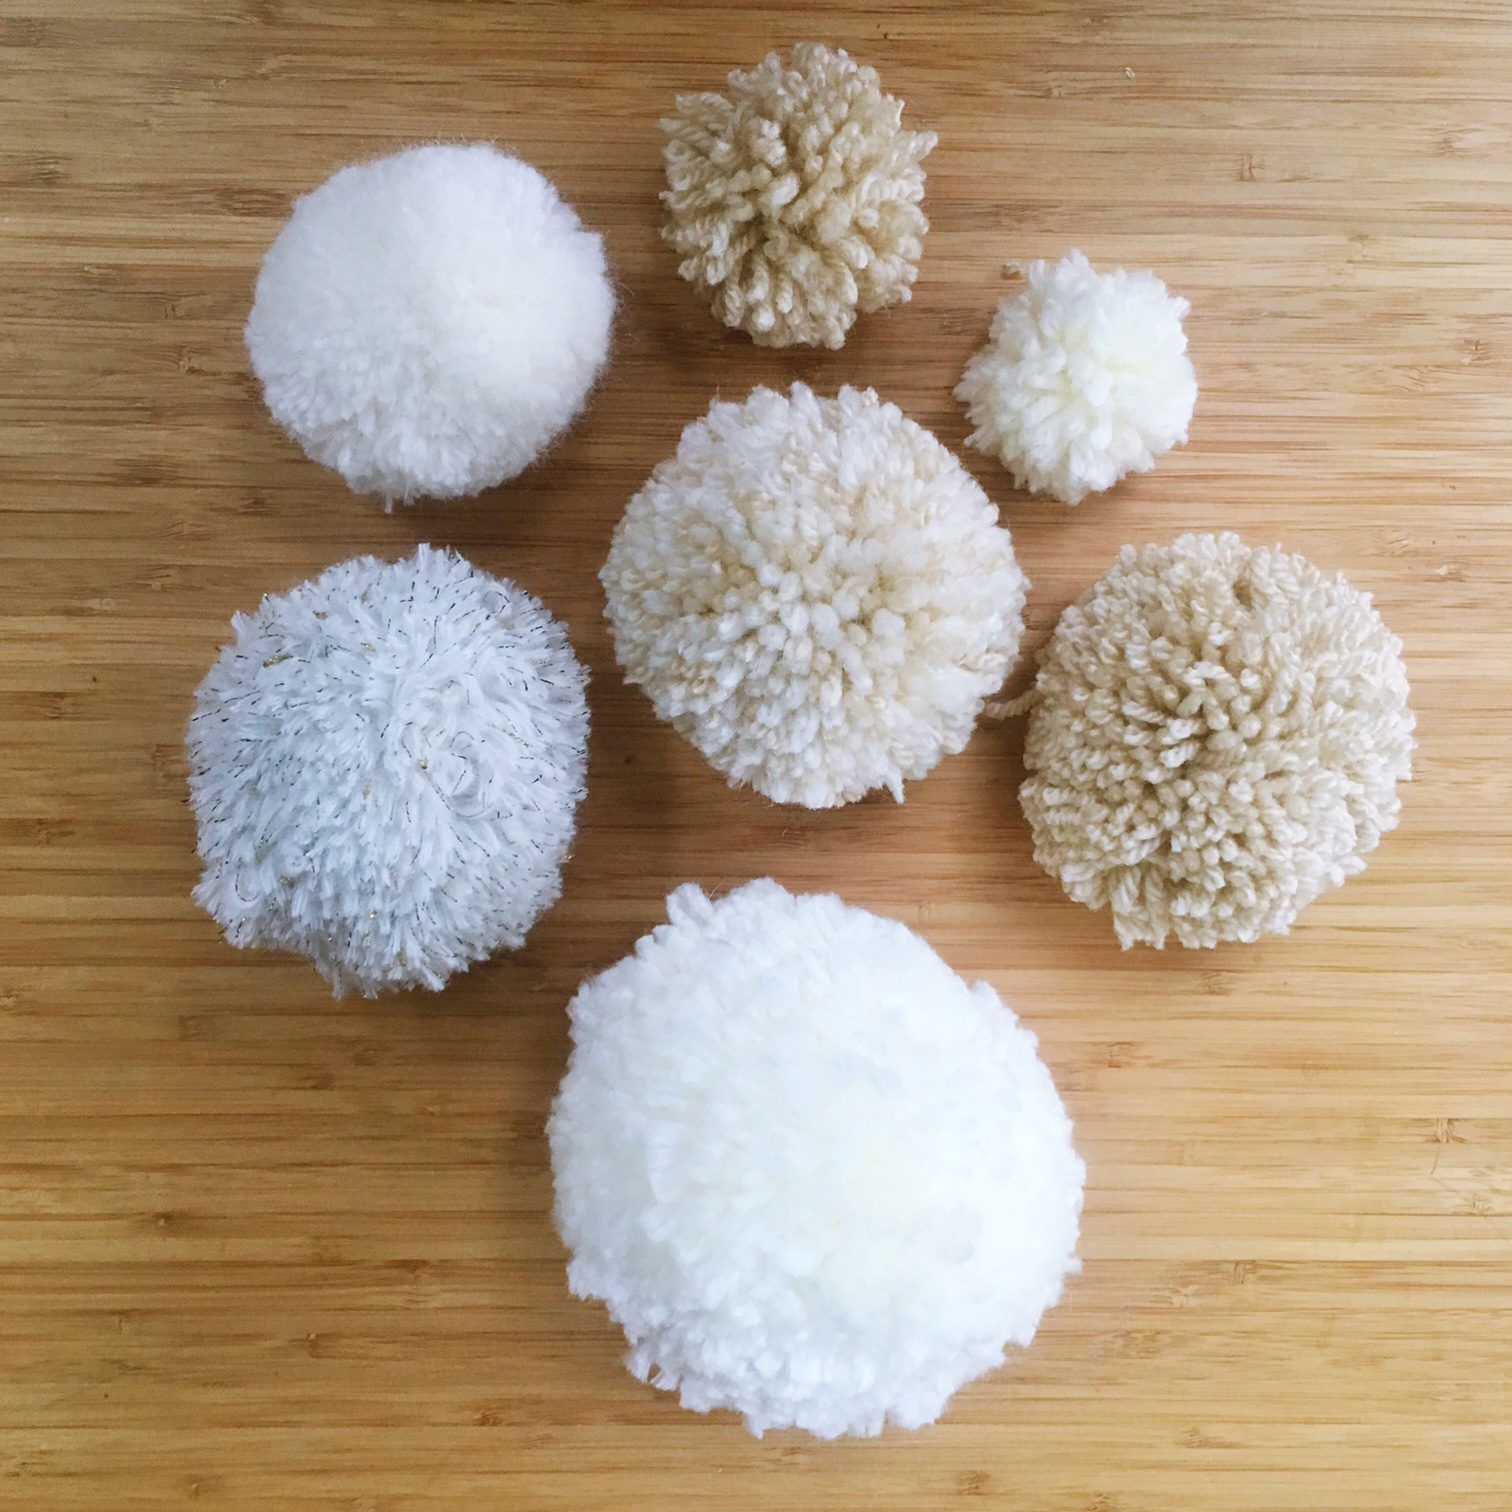
- Create More Pompoms
Make a selection of pompoms in different sizes and colors. To fill a wreath measuring 60cm across, we made 50 pompoms in 4 different sizes.
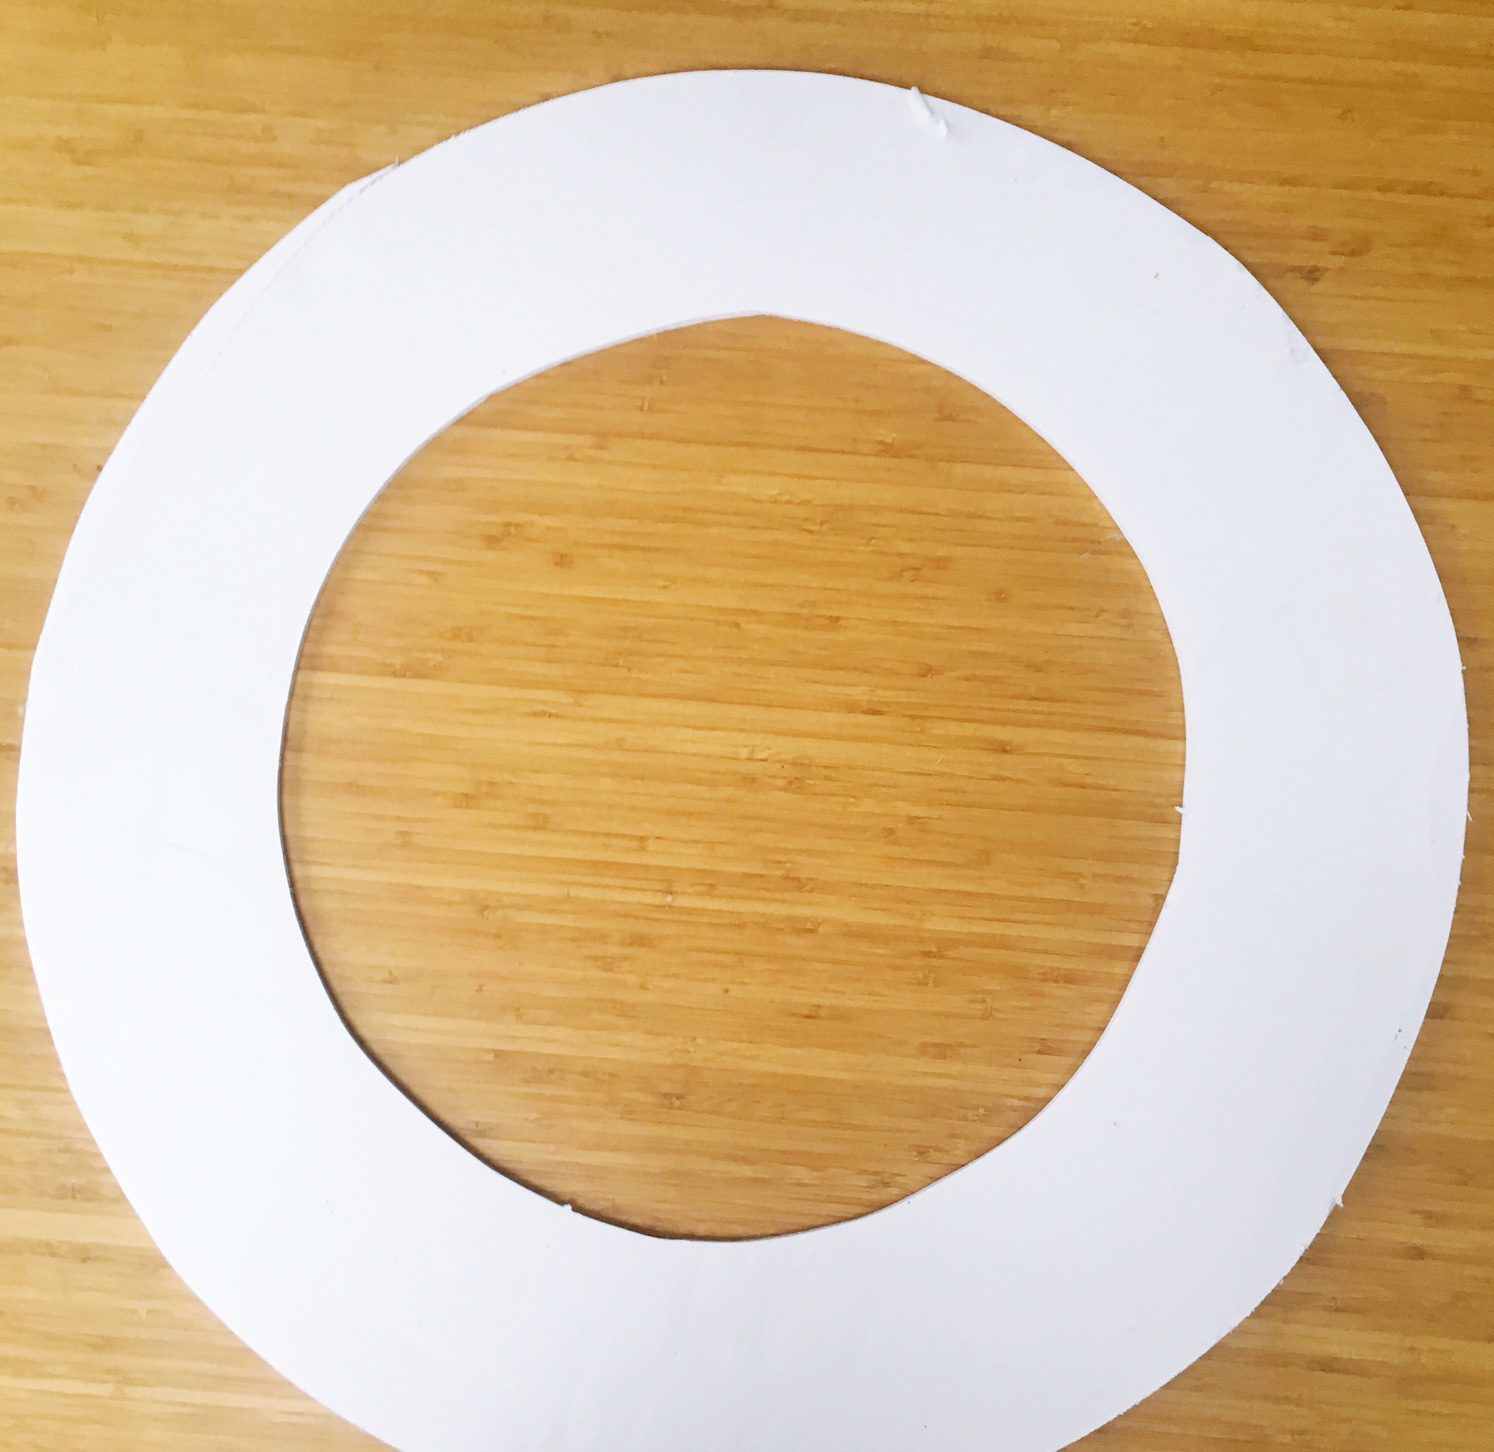
- Map Out Your Base
Take the pencil and tie one end of the string around the pencil near the tip. Use a small piece of tape to keep it in place. Determine the size of your wreath, and then divide the diameter by 2 to find the radius. So if your wreath is to be 60cm wide, the radius will be 30.
Cut the other end of the string to this length and then pin it onto the middle of the card – making sure you can rotate the pencil on the string all the way around and it doesn’t come off the card at any point. Use this pencil and string concoction to draw a circle on the card.
Make the piece of string 10 cm shorter and draw another circle inside the first.
- Cut Your Ring
Use scissors or a craft knife and a cutting mat to cut out the ring of the wreath.
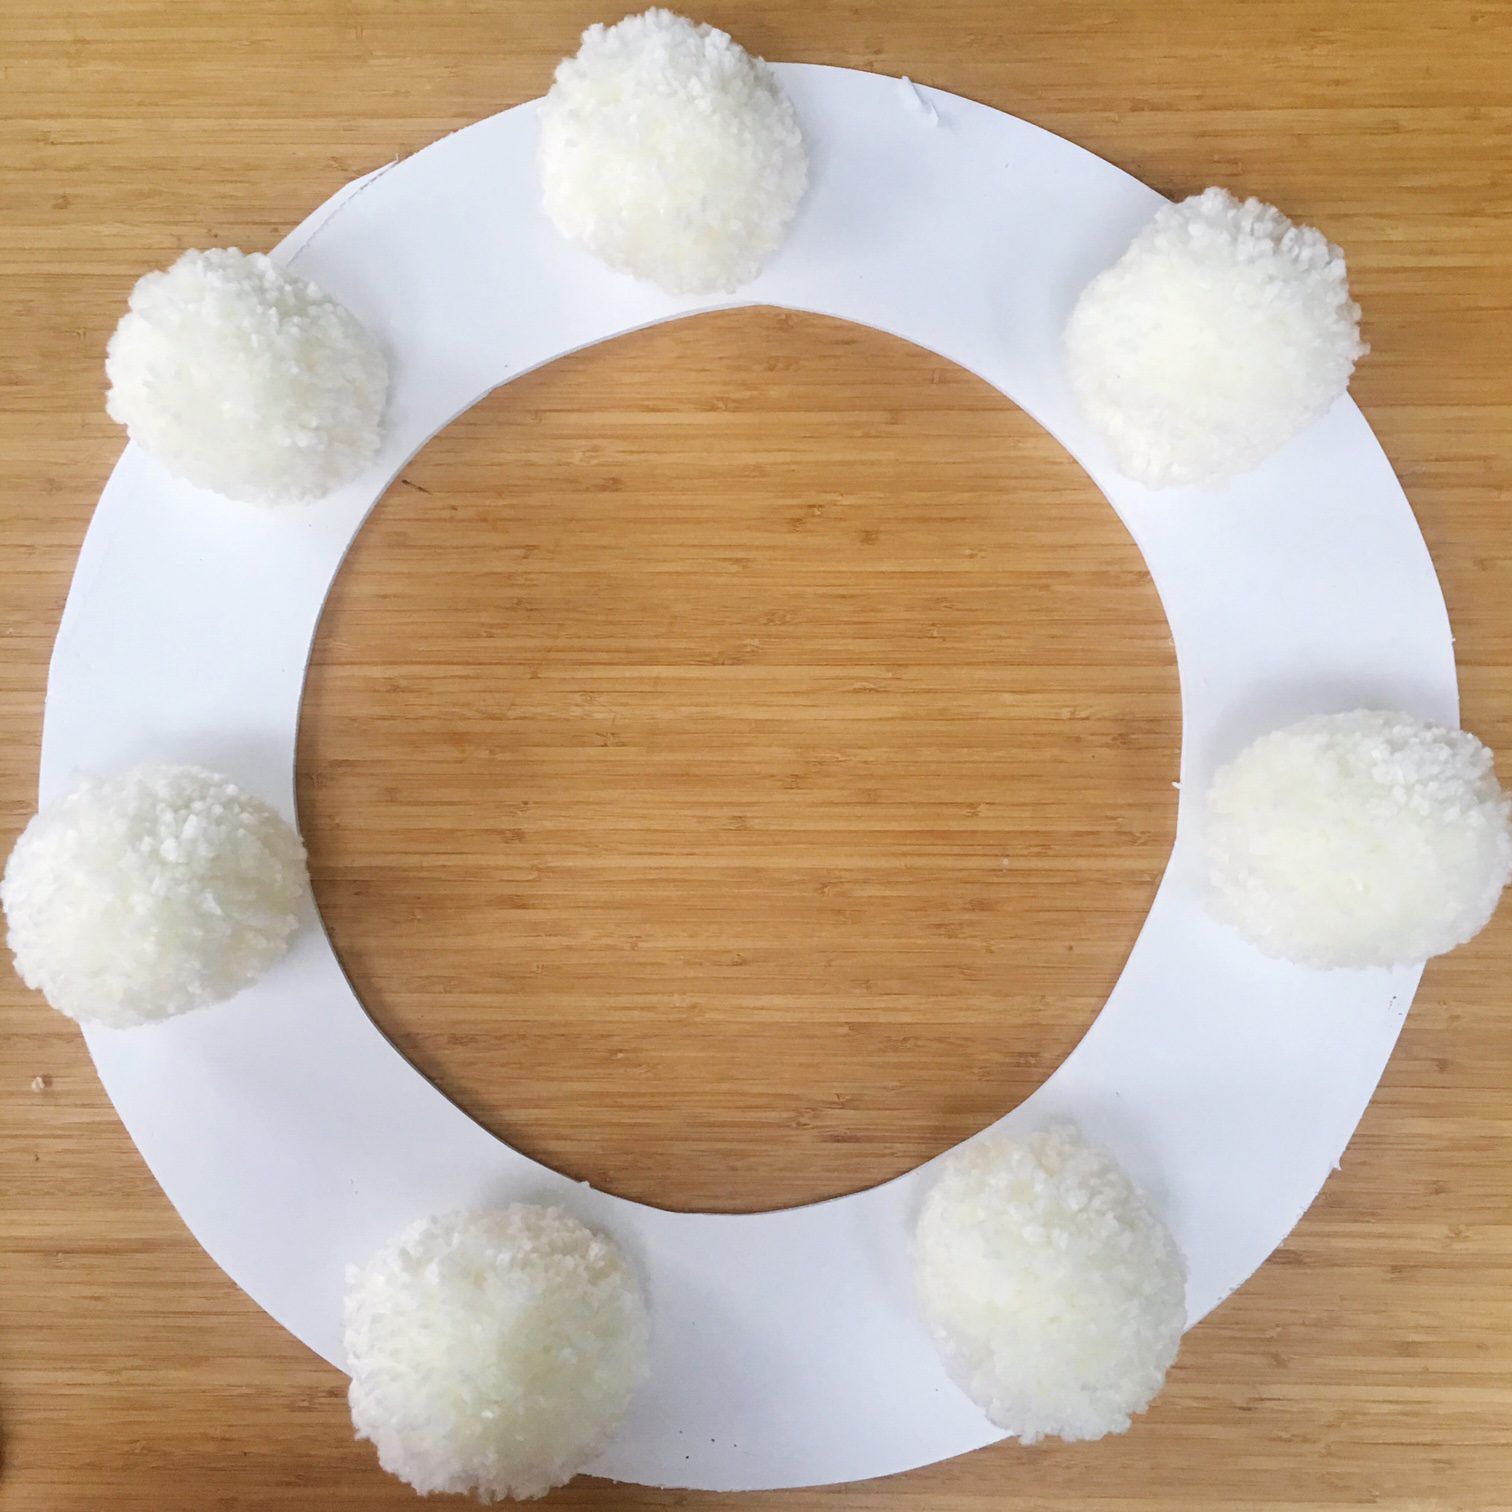
- Start Adding Pompoms
Begin arranging the pompoms, and place the largest pompoms equidistant from each other around the ring. Use a glue gun to secure the pompoms in place, pressing with your hand to ensure they hold firmly.
- Add More Pompoms!
Once you have the large pompoms in place, fill the gaps in between with different sizes and shades of poms. Use the smallest poms to fill in the edges to cover up any bare bits of cardboard.
- Arrange Your Fairy Lights
Take the set of fairy lights and turn them on. Starting at the bottom of the wreath, arrange the lights around the wreath, hiding the cable between the pompoms. Doing this with the lights on makes sure you have an even distribution of lights.
Place the battery pack at the front of the wreath and hide it with a bow, or secure it to the back of the card.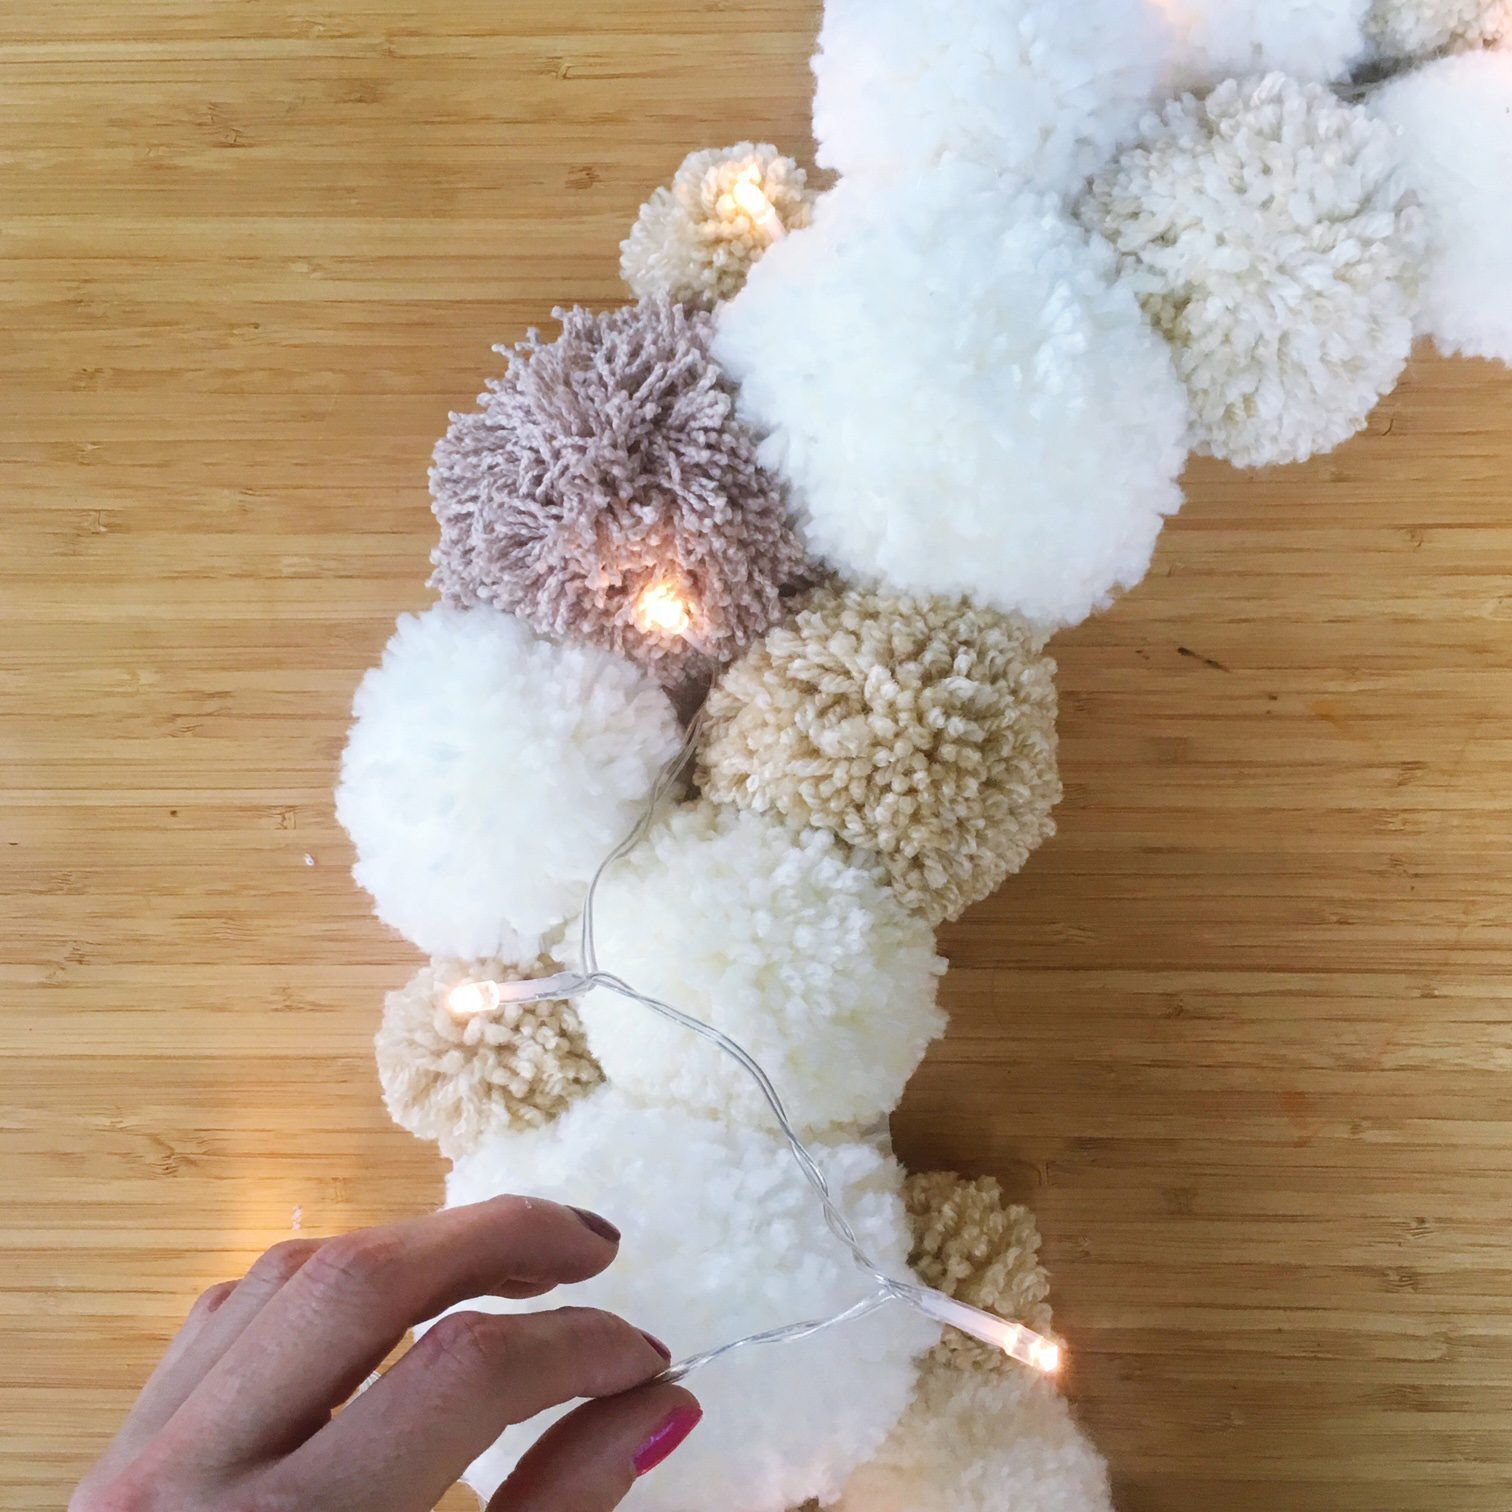
- Add Decorations
Finally, take all your Christmas decorations and arrange them around the wreath. Use the glue gun to fix in place.
- Hang Your Wreath
To hang the wreath, use VELCRO Brand HANGables Removable Wall Fasteners, which hold up to 1/2 lb.

To see more projects by Christine, check them out here. http://sewyeah.co.uk/