I love this time of year. As a Canadian living in the States, I love the time period between late November and January 1st. Family gatherings, parties and all the holiday festivities keeps me in smiles for weeks.
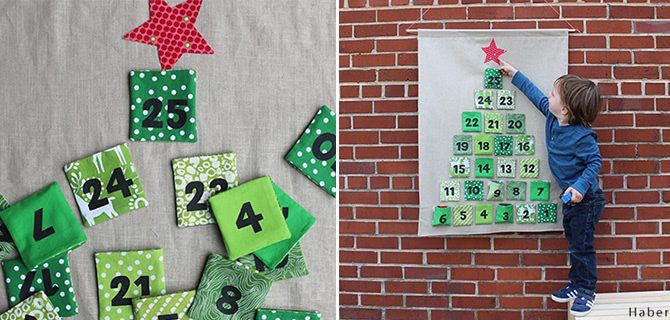
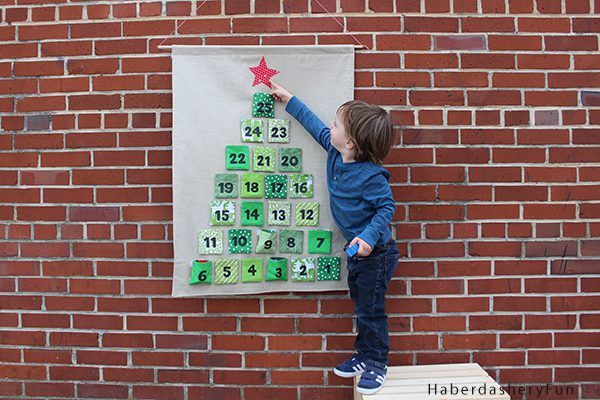
I was super happy when the VELCRO® Brand asked me if I wanted to participate in a holiday craft and come up with an advent calendar.. A little daunting at first, I had to wrap my head around a design and what I was going to sew. I pondered the idea for a few weeks and how VELCRO® could make for a fun, holiday activity… My son is starting to learn his numbers and ABCs. I decided an advent calendar with removable pouches would not only be a great learning tool, but also an amusing activity leading up to the big day.

Materials Needed:
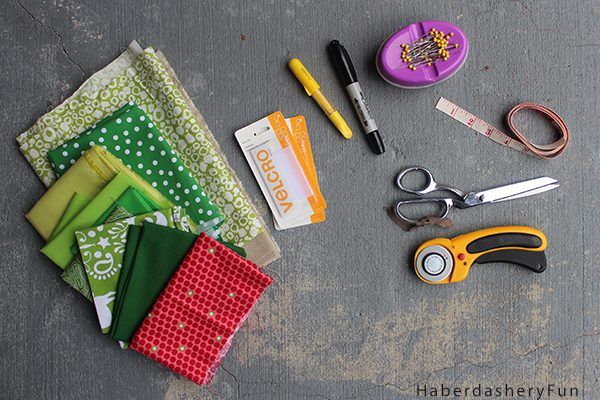
1. Advent calendar – 1 – 2 yards in a light color fabric
2. Pouches – Scrap fabric or fat quarters in mixture of colors
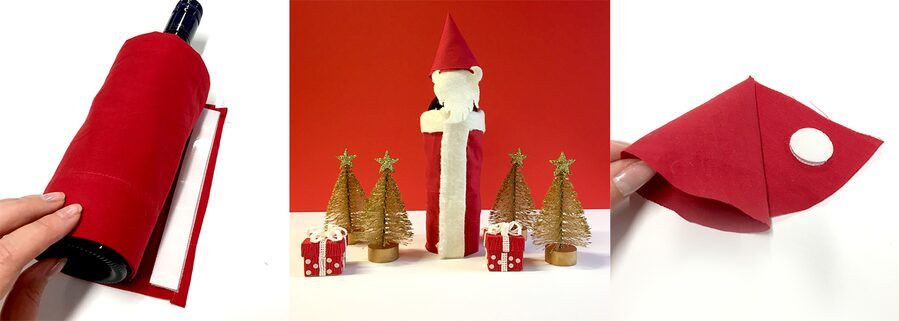
3. VELCRO® Brand Iron On Fasteners – 3 boxes of the tape or 6 boxes of the strips
4. Fusible web – small piece to appliqué star
5. Rotary cutter, cutting mat and ruler
6. Sewing machine and sewing materials
7. Iron and ironing board
8. Dowel, hooks and string
9. X-Acto knife and cutting mat
10. Paper and pen
11. Freezer paper, fabric ink , cardboard and sponges
Let’s get started:
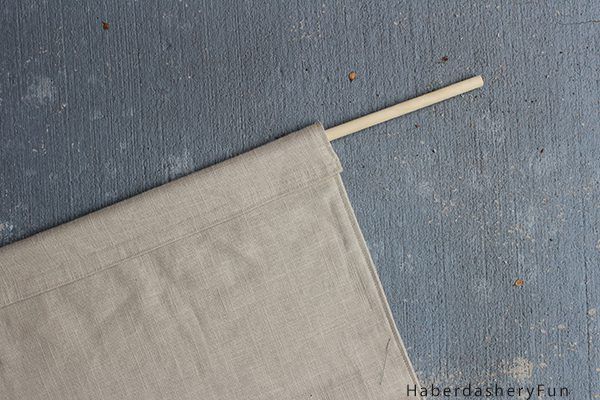
Step 1: Sew the advent calendar backing – Cut 2 large rectangles measuring 38″L x 28″W. Place right sides together and sew all 4 sides together. Leave an opening along the bottom edge approximately 4″ – 5″. Press seams. Trim each corner. Pull right side out through the opening, wiggle corners into place. Turn under bottom opening edge, press and pin closed. Create the dowel holder at the top edge – Turn and fold the top edge under approximately 2″. Insert dowel inside to make sure it slides in ok. From one side to the other, trace a straight line with a marking pen, pin. Place into sewing machine and stitch following the line. Topstitch around the outside edge.
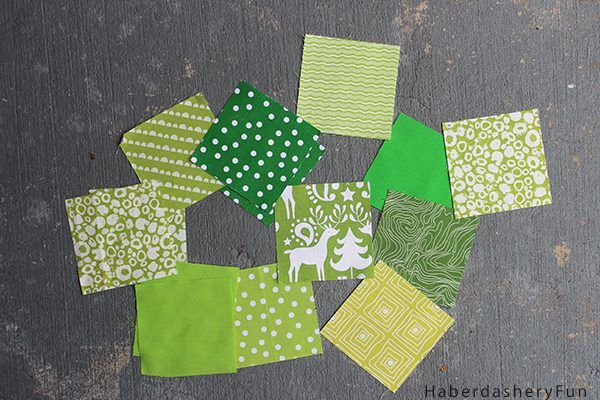
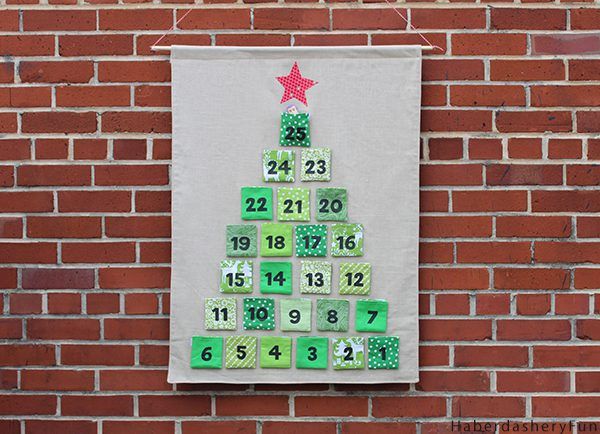
Step 2: Cut 100 squares measuring 4″ x 4″. Cut squares in a variety of colors for a fun look – mix & match front, back and lining pieces.

Step 3: Print numbers 1-25. Font size is approximately 1-1/4″. Place freezer paper onto work surface, shiny side down. Trace the numbers onto freezer paper. Make sure to leave room between numbers. Cut out all numbers with the X-Acto knife. Cut around each number, make sure to leave enough room on the sides [extra room for sponge and fabric ink]. Iron numbers 1-25 on each little square. Note – Remember the seam allowances when finding number placement.
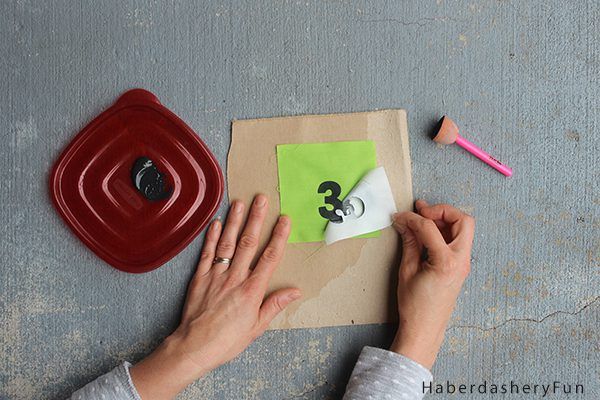
Step 4: Squeeze a small amount of fabric ink into a small dish. Place fabric square onto the piece of cardboard. Use sponge and dip into fabric ink. Gently dab onto the open areas of the freezer paper. Do not goop the fabric ink or it will run. Wait a few seconds until just slightly tacky. Pull off freezer paper. Repeat for all numbers.
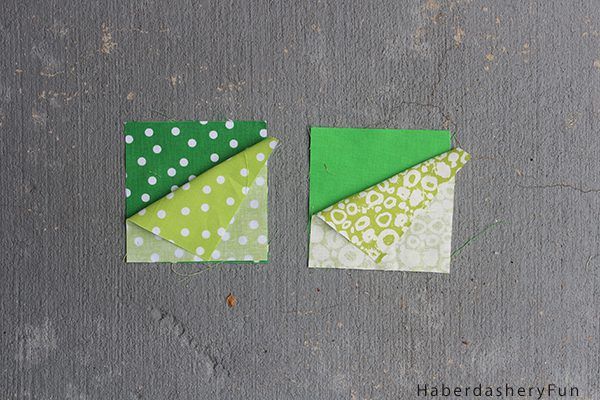
Step 5: Sew the squares – Place 2 squares right sides together and place 2 lining squares right sides together. Pin if needed. Place into your sewing machine and stitch 3 sides together with a 1/4″ seam allowance. Press. Sew all squares together and make 50 little pouches. Trim bottom corners. Press.
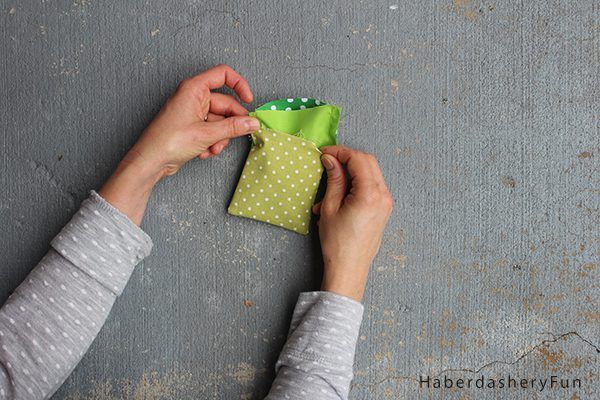
Step 6: Turn one pouch right facing side out and leave the other pouch right side facing in. Place one pouch inside the other. Wiggle into place. Place back into your sewing machine and stitch each pouch together around the top edge. Leave a small opening to pull right side out. Press.

Step 7: Pull one pouch right side out through the small opening. Wiggle everything into place. Press with an iron. Fold under seam allowance for the opening. Place into sewing machine and topstitch around the top edge. Backstitch.
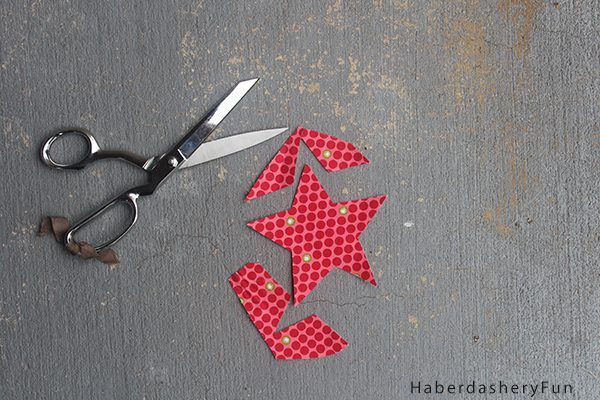
Step 8: Create the star appliqué – Iron red fabric onto fusible web. Draw star on back of fusible web, cut out. Peel back of fusible web from the star. Find center of the advent calendar and press down. Stitch around the star.
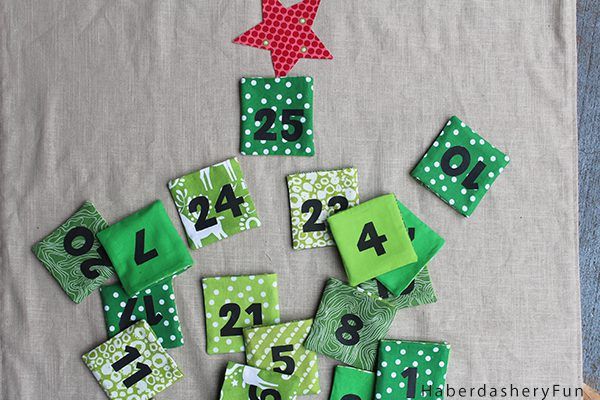
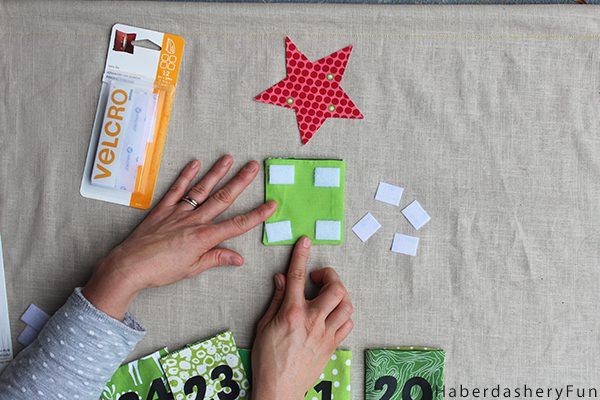
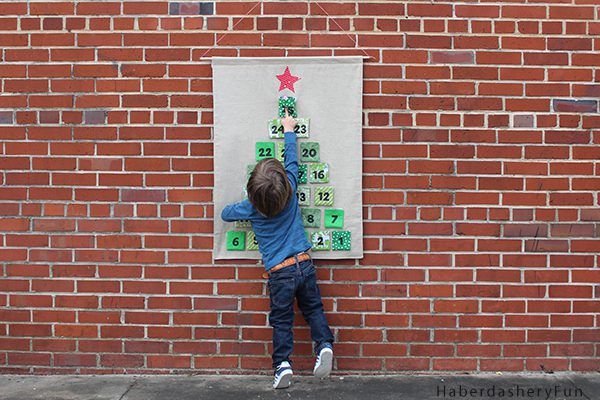
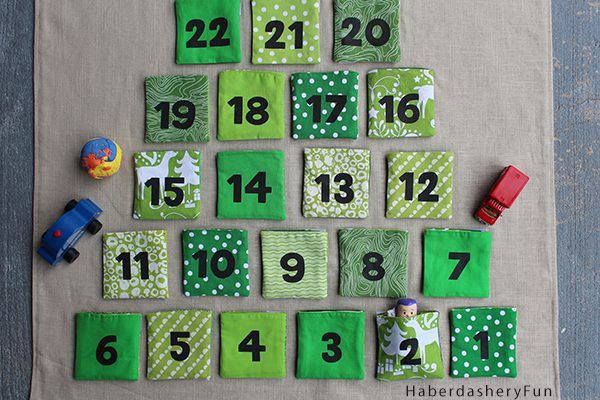
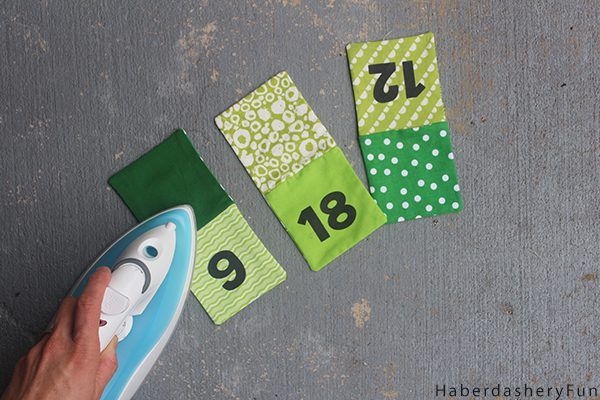
Step 9: Create the tree design on the advent calendar – Cut the VELCRO® Brand Iron On Fasteners into small square pieces. Peel the backing from each square and place 4 hook pieces on one pouch. Repeat for each pouch. Press the fasterners in place with an iron. [ Read package for directions]. Lay the 25 pouches on the advent calendar in a tree design. Peel the backing from the alternating/ loop pieces and press in place under each pouch.
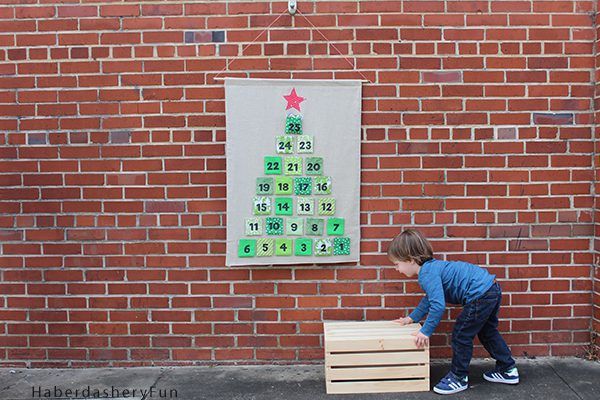
That’s it – Have a wonderful holiday season! As this project came together, I realized what a unique tradition I was creating. What an entertaining project for the whole family to do together. Enjoy!