Whether you are sanding by hand or with an orbital sander, sanding is an essential part of the woodworking process and there is nothing worse than when your sanding pads aren’t sticking to your sander. In this article we’ll show you how to properly replace a sander pad on a worn out sander. First things first, before we dive into the process, it’s important to know answers to a few questions before you get started:
Yes, you can attach regular sandpaper to an orbital sander using VELCRO® Brand Industrial Strength adhesive strips. These strips provide a strong and reliable bond between the sandpaper and the sander’s pad, allowing you to use a wide range of sandpaper options for your projects. Simply cut the sandpaper to the size of your sander’s pad, attach it using the adhesive strips, and you’re ready to sand with ease.
Signs of a worn-out pad include reduced sanding efficiency, poor grip on the sandpaper, or visible wear and tear such as tears, cracks, or an uneven surface. If you notice any of these signs, it’s time to replace the pad.
How to Put Sandpaper on a Sander
What You Need:
To replace a sander pad, gather the following materials:
- New sanding pad or sandpaper: Make sure it is compatible with your sander model.
- VELCRO® Brand Industrial Strength Tape: These will securely attach the sanding pad to the sander.
- Screwdriver and or drill (if required): Some sanders may require removing screws to replace the pad.
Time needed: 15 minutes
- Get Your Sandpaper or Sanding Disc
Select the sandpaper or sanding disc that matches your desired grit level. Ensure it is compatible with your sander’s size and shape. This step is crucial for achieving the desired sanding results.
- Attach Your Sandpaper or Sanding Disc
To properly attach your sandpaper, you’ll need to determine what type of sander you’ll be using: a hand sander or a palm or orbital sander.
How to Put Sandpaper on a Hand Sander
- Cut a piece of VELCRO® Brand Industrial Strength Tape to fit the size of your hand sander.
- Remove the liner from one side of the fastener and firmly press it onto the hand sander.
- Peel off the remaining liner and attach it to your sandpaper.
- Align and attach your sandpaper to the hand sander, ensuring it is firmly pressed down.
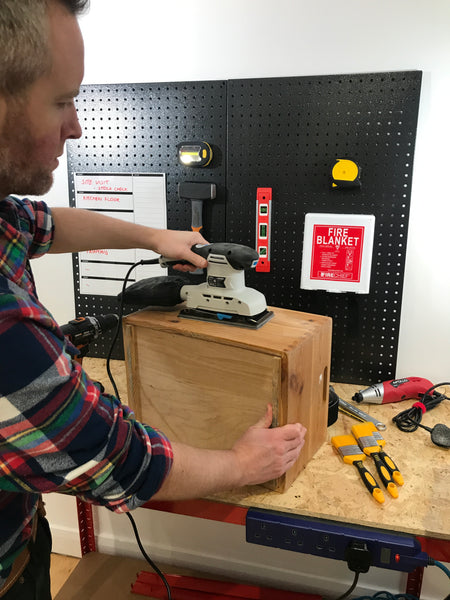
How to put Sandpaper on a Palm Sander or Orbital Sander
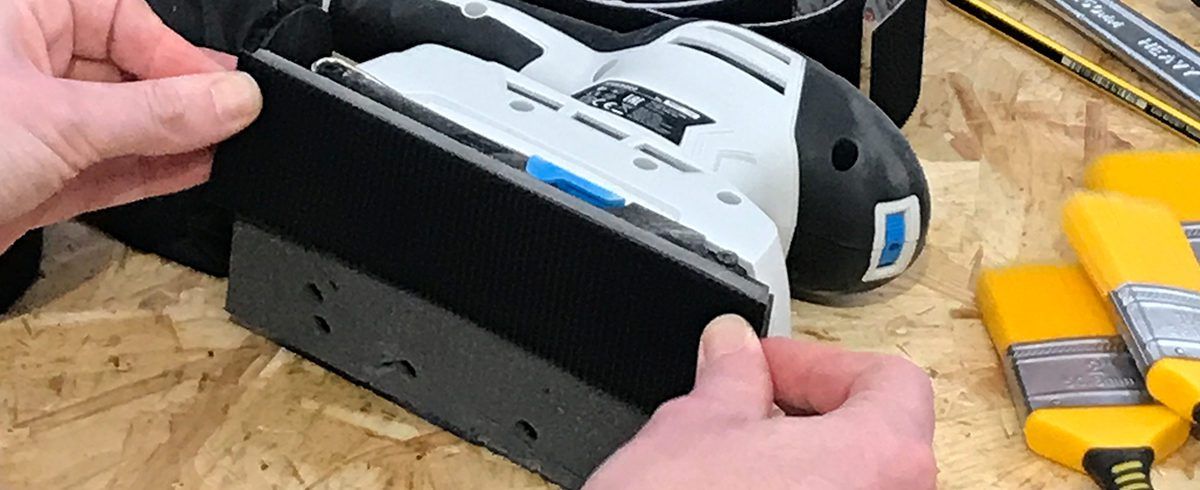
Start by removing the old hook sheet that’s attached to your electric sander. This will take some strength but it can be peeled off. If not, simply sand it down until you’re left with a smooth surface to work with.

Next, apply two new strips of VELCRO® Brand Industrial Strength Tape. Make sure you use the hook side of the tape (the scratchy side).

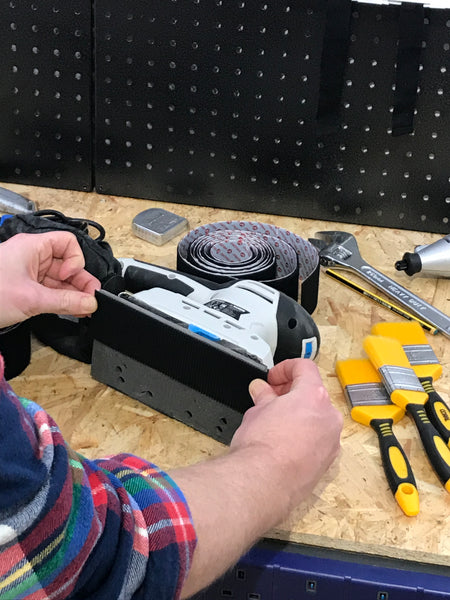

Now stick a new sanding pad to your sander.

Finally, drill dust holes into the new layer of VELCRO® Brand Industrial Strength Tape. You can do this while it’s stuck to your sander – just make sure the sander not plugged in.

And that’s it – your worn out sander is repaired and ready for any DIY job that comes your way.
Stay on our blog for more DIY tips and tricks using VELCRO® Brand Industrial Strength Tape!


