Moving season is here! With any new place, you’ll want to design your apartment in creative, affordable and damage-free ways!
Vinyl records are a great way to decorate on a budget! In this easy step-by-step tutorial, we’ll show you how to hang vinyls on your wall without nails or screws! Well, what are you waiting for? Let’s get started!
Table of Contents:
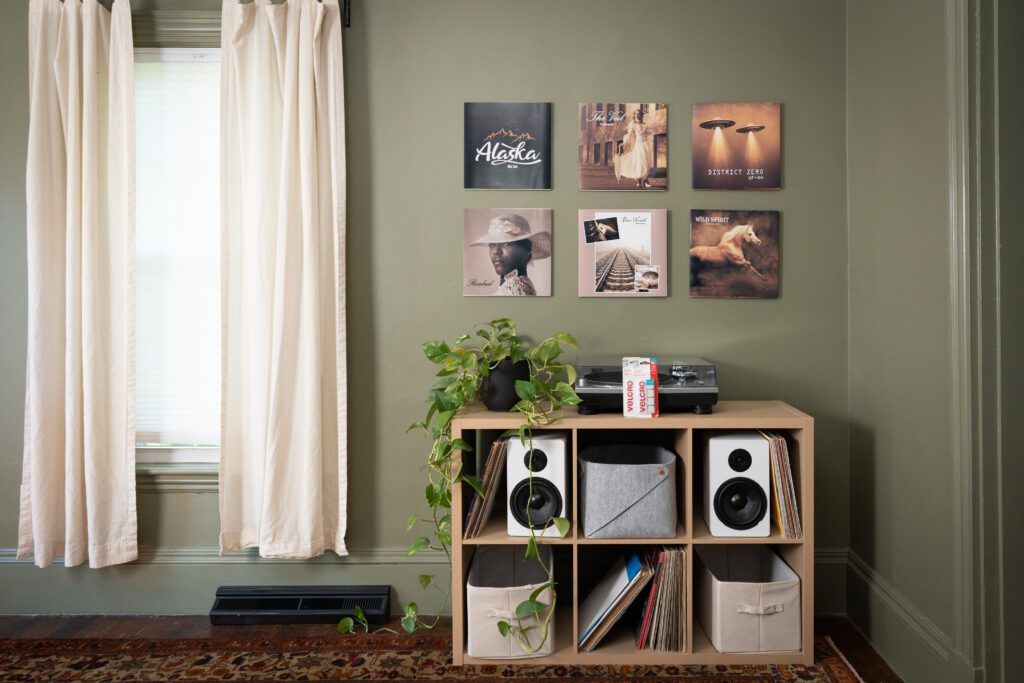
The best way to hang vinyls on the wall is to use damage‑free mounting solutions that protect both your records and your space. VELCRO® Brand Removable Mounting Squares keep sleeves flat against the wall while allowing you to easily rearrange your record wall décor. This approach is renter‑friendly, affordable, and perfect for creating a clean, gallery‑style look.
Creating vinyl record wall décor starts with choosing album covers that reflect your personal style or color palette. Arrange the sleeves in a grid, row, or creative pattern to turn your collection into eye‑catching vinyl record wall art.
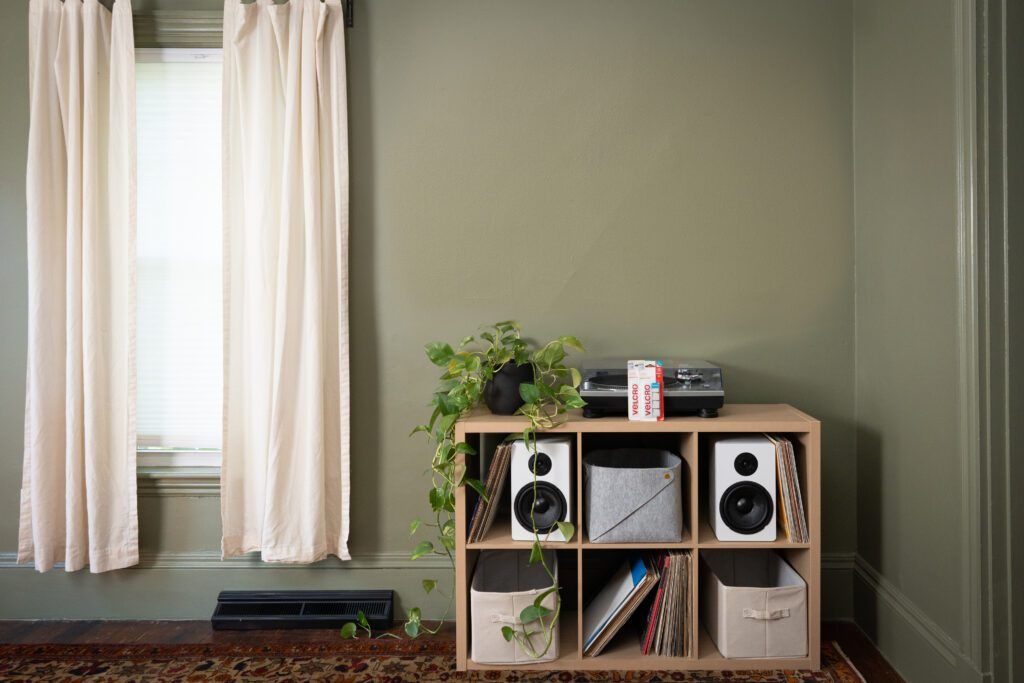
Space each record evenly and use consistent mounting materials. This will create a more polished look that doubles as functional art.
How to Hang Vinyls on The Wall
Materials Needed
- 4-6 Records
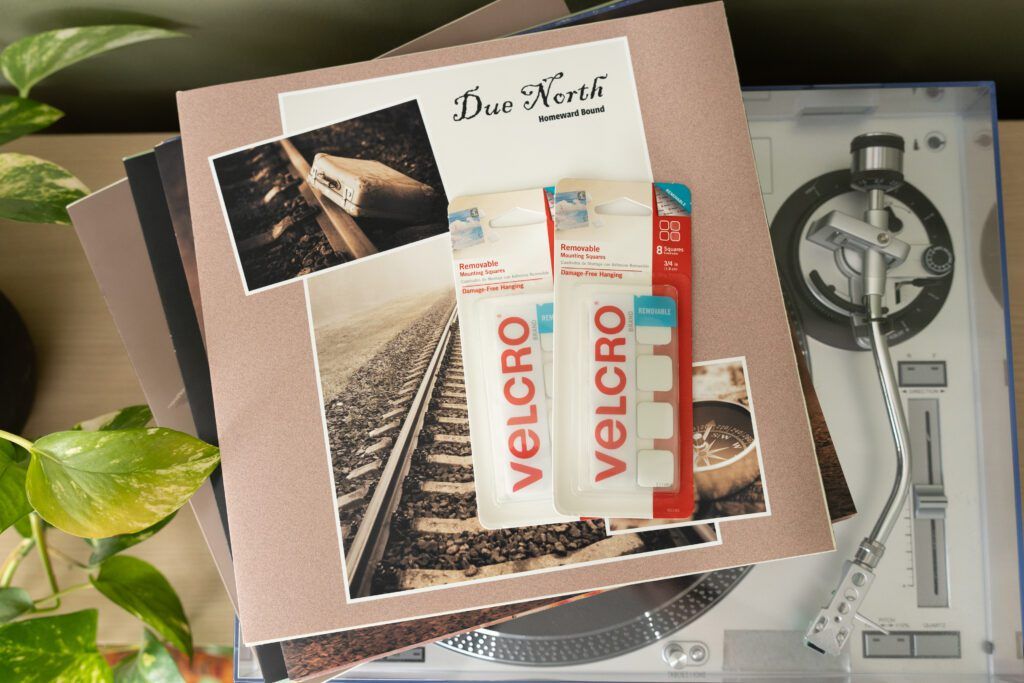
- VELCRO® Brand Removable Mounting Squares
How to Make It
Vinyl records are a fun, budget‑friendly way to add personality to your walls, and with VELCRO® Brand Mounting Squares, you can hang them securely without nails, screws, or tools. In this simple step‑by‑step tutorial, we’ll show you how to display your vinyls while keeping your walls intact—perfect for apartments and rentals.
- Pick Your Records
First things first, you’ll want to pick up a couple of records. Usually, your local record store will have a $5 bin you can sort through and pick your favorite album covers.
- Map Out A Spot
Once you’ve chosen your vinyl, pick a spot in your apartment where you’ll want to hang your records. This will be a focal point for the room, so we recommend using a large and blank wall.
- Measure
Before you start to hang your records, don’t forget to measure how high you want them to hang and the distance between each vinyl.
- Remove The Records
Next, remove the records from the sleeves and place them safely away.
- Clean
With a microfiber cloth, clean the backside of the sleeves and the wall with rubbing alcohol. Wait until dry.

- Add Finishing Touches
On the back of the record jacket, remove the liners from the VELCRO® Brand Removable Mounting Squares. Then place one on each corner of the sleeve. Then hang.

And that’s it! Now you can enjoy your beautiful record wall!
Try this out yourself and don’t forget to pick up a pack of VELCRO® Brand Removable Mounting Squares.
Tag us in social @VelcroBrand.